How to Create a Prescription
This guide shows you how to add a new prescription (Rx) within the CarePortals platform. While prescriptions often come into the system automatically through integrations with physician groups, you might need to create one manually in certain situations, especially if your practice uses in-house physicians.
You can create a prescription from two main places in CarePortals’ Electronic Medical Record (EMR) Portal:
From an Order: This is useful when you are already reviewing a specific patient order that requires a prescription.
From a Patient Profile: This is helpful if you need to write a prescription but are not currently working within a specific order.
Create a Prescription from an Order
Navigate to the Orders section from the main menu.
Find and click on the specific order to open its details.
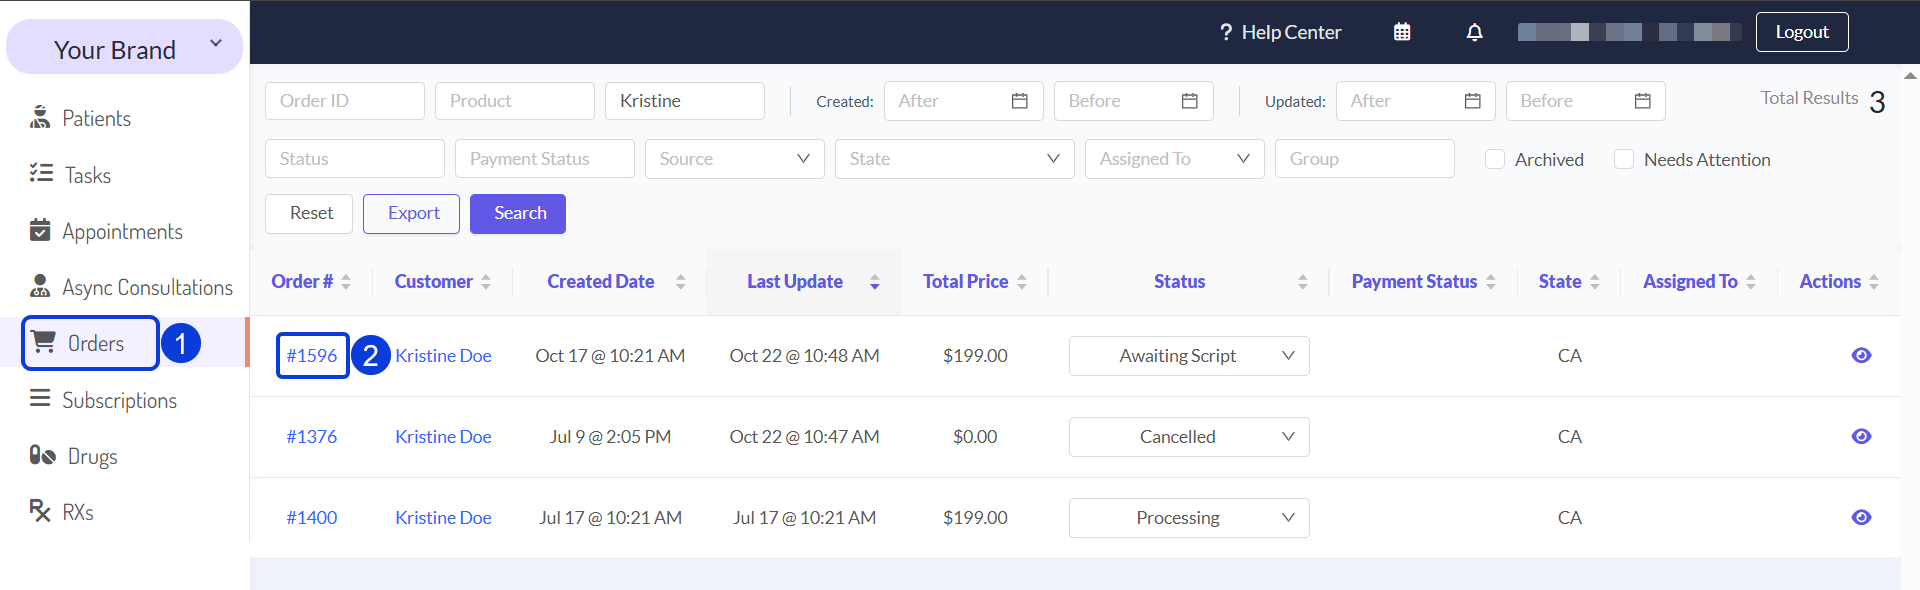
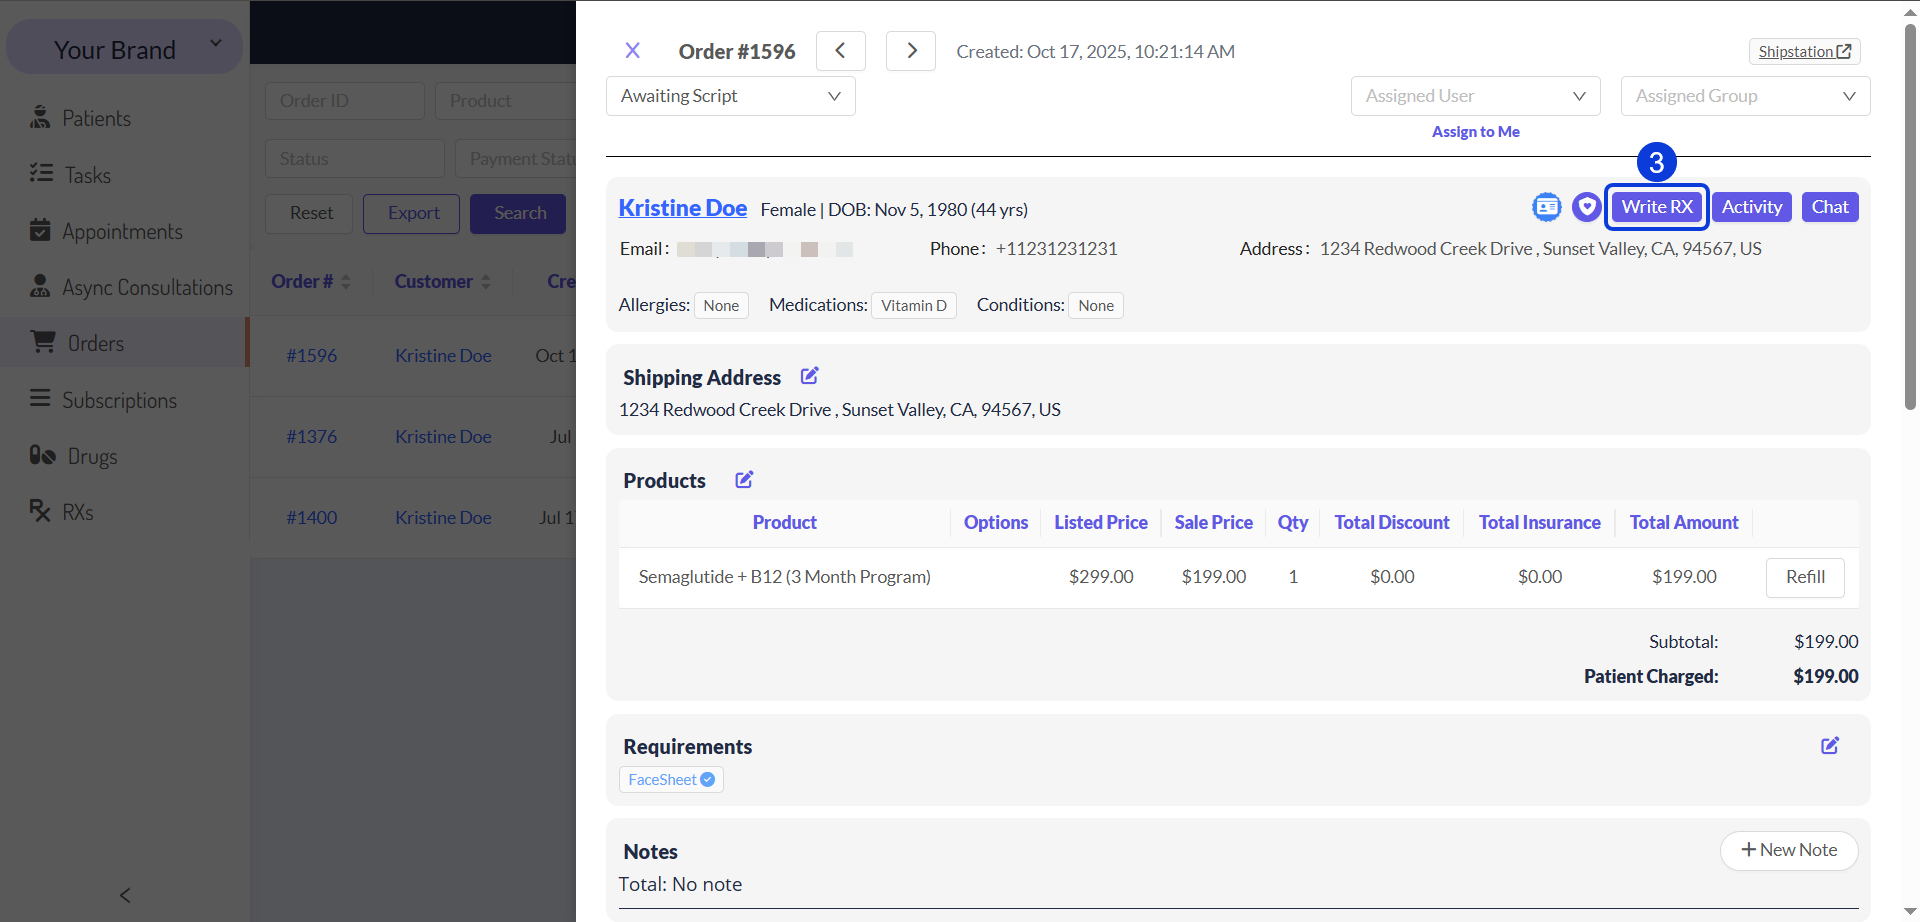
Click the Write RX button, located to the right of the patient's details.
A prescription form will open. See the Fill Out the Prescription section for details on how to complete it.
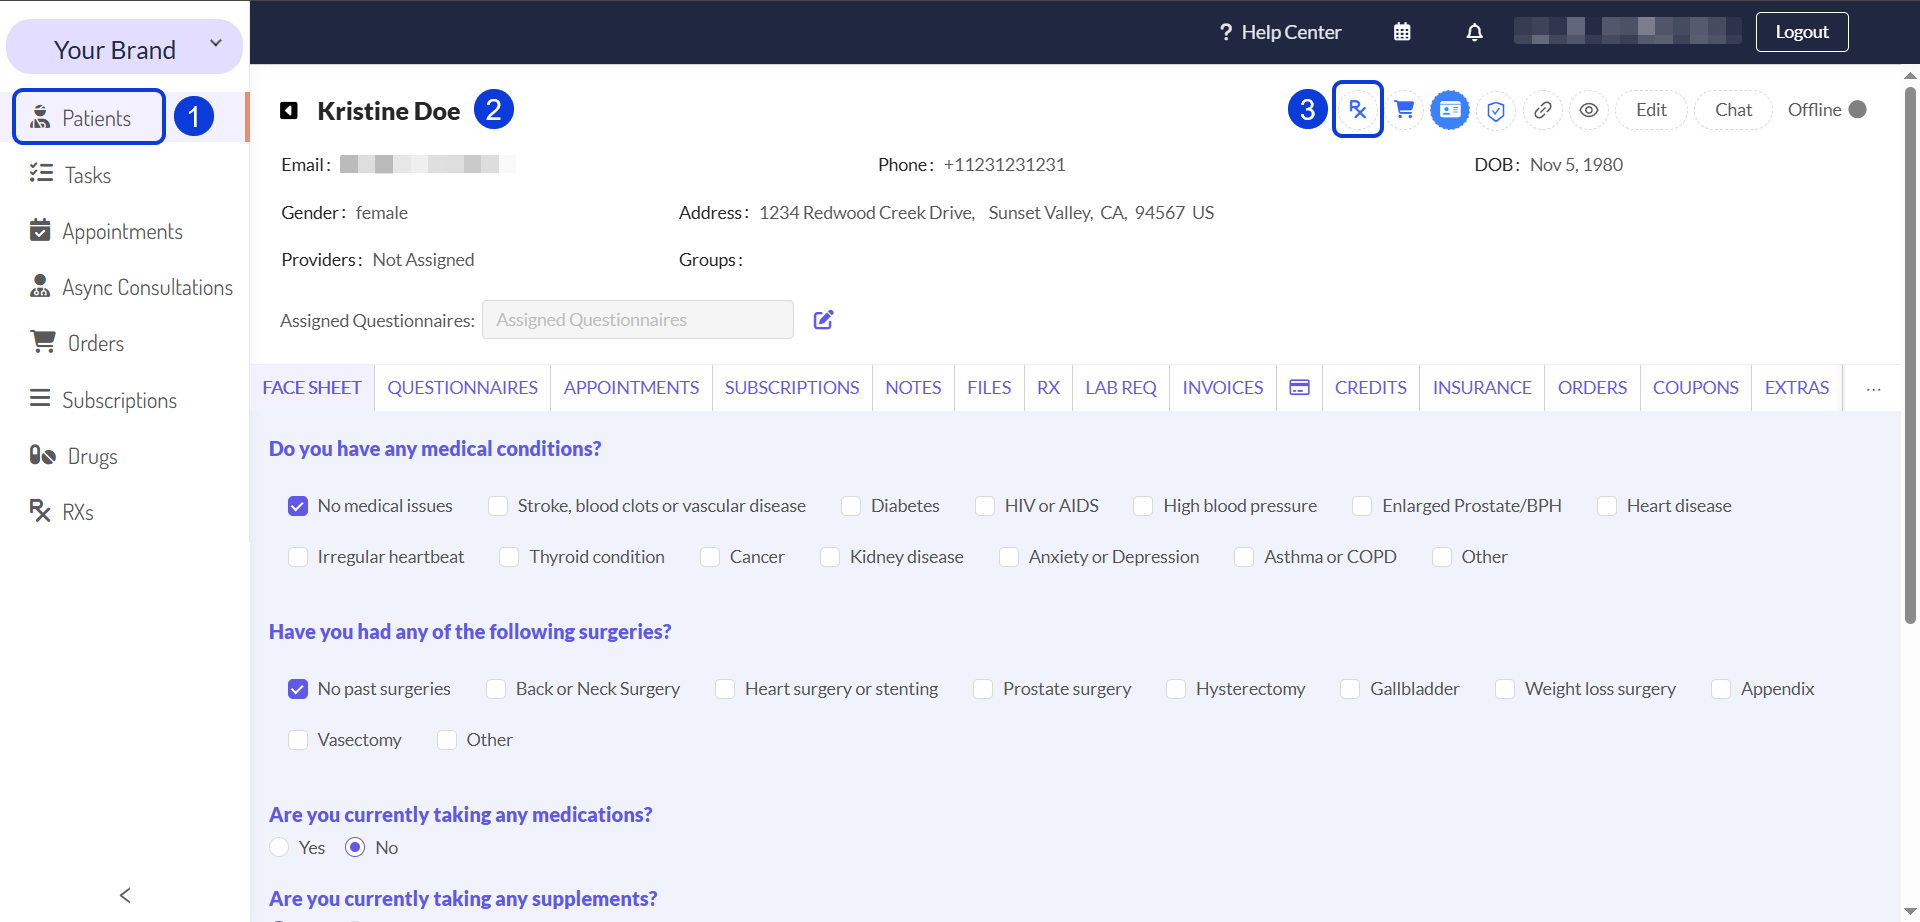
Create a Prescription from the Patient Profile
Navigate to the Patients section using the main menu on the left.
Find and select the patient to open their full profile.
On the patient's profile page, click the RX button located in the top-right action bar. Alternatively, you can access the RX tab > Create RX.
A prescription form will open. See the Fill Out the Prescription section for details on how to complete it.
Fill Out the Prescription
Once you have opened the prescription form, follow these steps to fill it out.
In the Lookup drug by name field, start typing the name of the medication and select the correct drug from the list that appears.
To select a drug, it must first exist in your Drugs catalog. It is important to configure all its details properly, as this ensures your prescriptions are accurate. Learn how to add a new drug and complete its fields in the How to Add a New Drug to Your Catalog guide.
Click the Add Drug button. It will be added to the top of the prescription.
Once the drug is added, its default specifications (like quantity, refills, and directions) will automatically populate. Review and edit these fields as needed for the patient:
Mitte: Adjust the quantity to be dispensed (e.g.,
1vial).Refills: Enter the number of allowed refills for this patient (e.g.,
0).Directions (SIG): If needed, modify the text box with the patient's specific instructions (e.g.,
Inject 0.30ml (30 units) subcutaneously 1 time(s) per week.).
In the RX Note field, you can type any internal notes for your records or specific instructions for the pharmacy, if needed.
The Extras and Metadata fields are typically for advanced use or system integrations. You’ll typically leave these blank unless you have a specific reason to add any.
When all the information is correct, click the Create RX button at the bottom to finalize and issue the prescription.
Next Steps
Now that you understand how to create a new prescription, you may want to learn about related tasks.
Prescriptions Management: Learn how to manage already existing patients’ prescriptions.
Managing Orders in CarePortals: Get a comprehensive view of all patient orders, which are directly linked to prescriptions.
Create a Product: Understand how to set up Products in the CRM portal.