How to Manage Team Members’ Access
The Admin panel in the CRM Portal is the control center for your organization. From here, you can manage your entire team's access to the CarePortals platform. This central hub provides the tools to build and maintain your team by creating new user accounts, assigning specific roles, and updating permissions as responsibilities change. This guide explains how to perform all key user management tasks:
Adding team members
Editing team members’ access
Removing team members
Add a Team Member
Follow these steps to invite a new team member to your organization:
From the CRM Portal, navigate to the Admin section on the main menu.
Select Users. A list of all current users in your organization will be displayed.
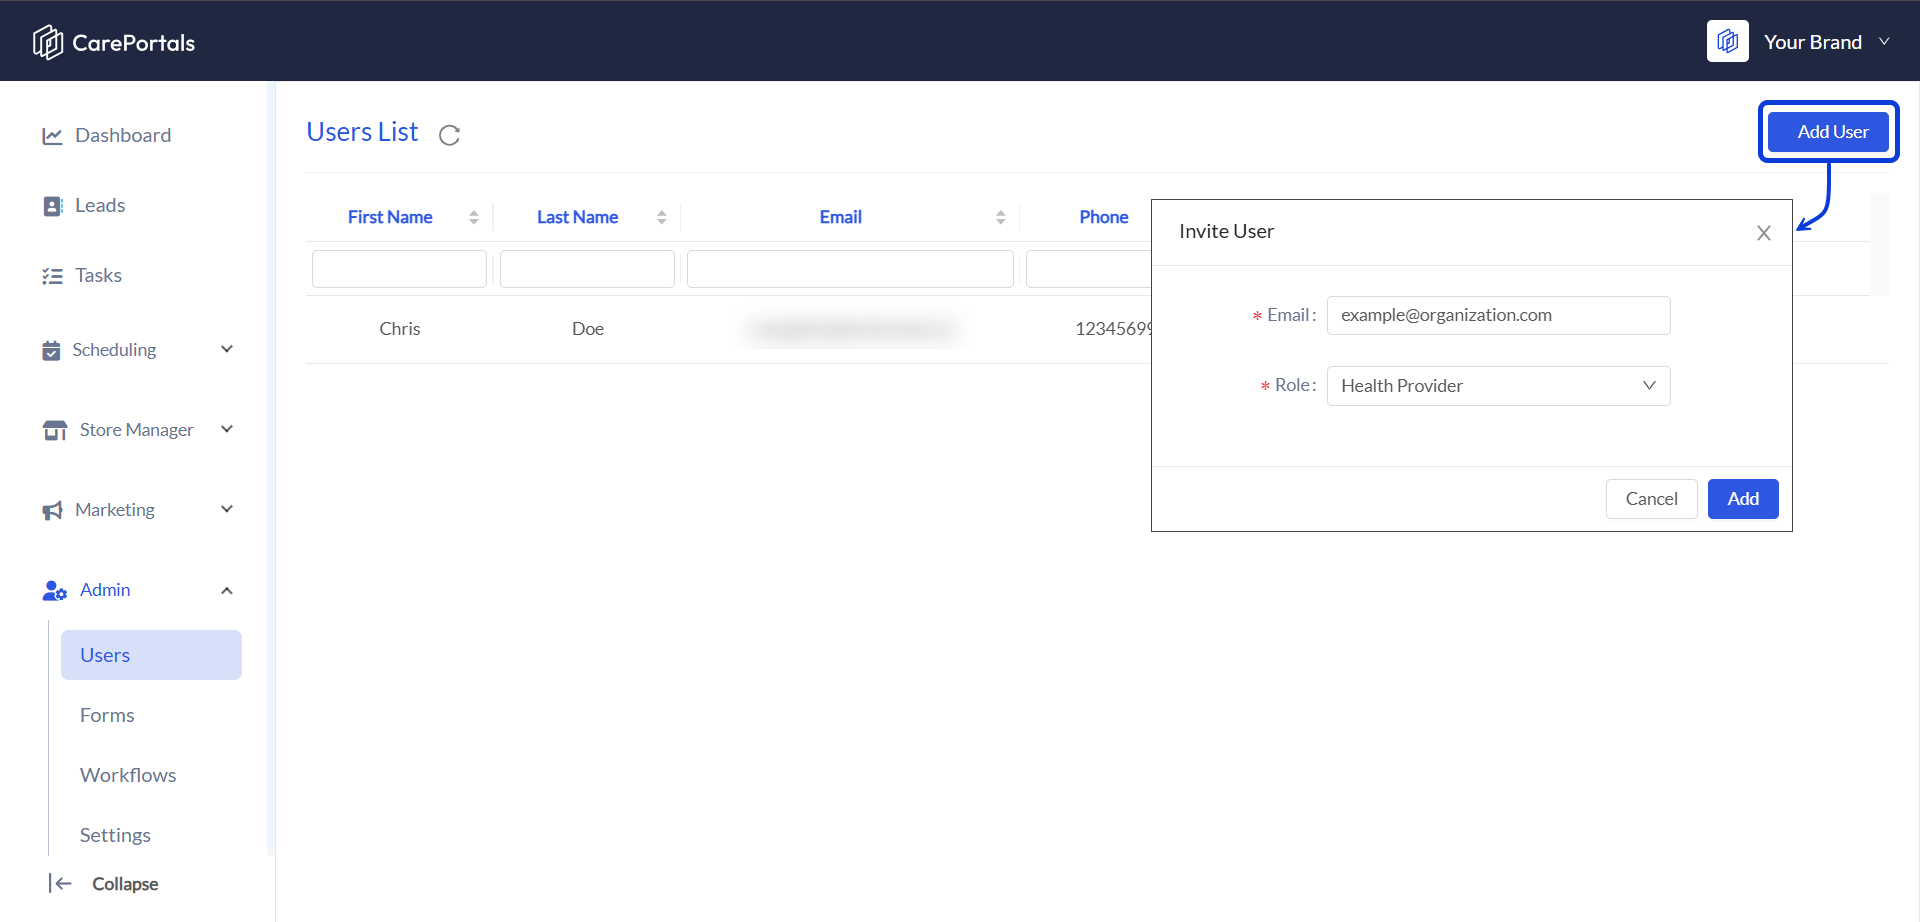
Click the Add User button in the top-right corner.
The Invite User modal will open. Enter the new user's email address and select a role for them from the dropdown menu.
Click Add. The new user will now appear in the list.
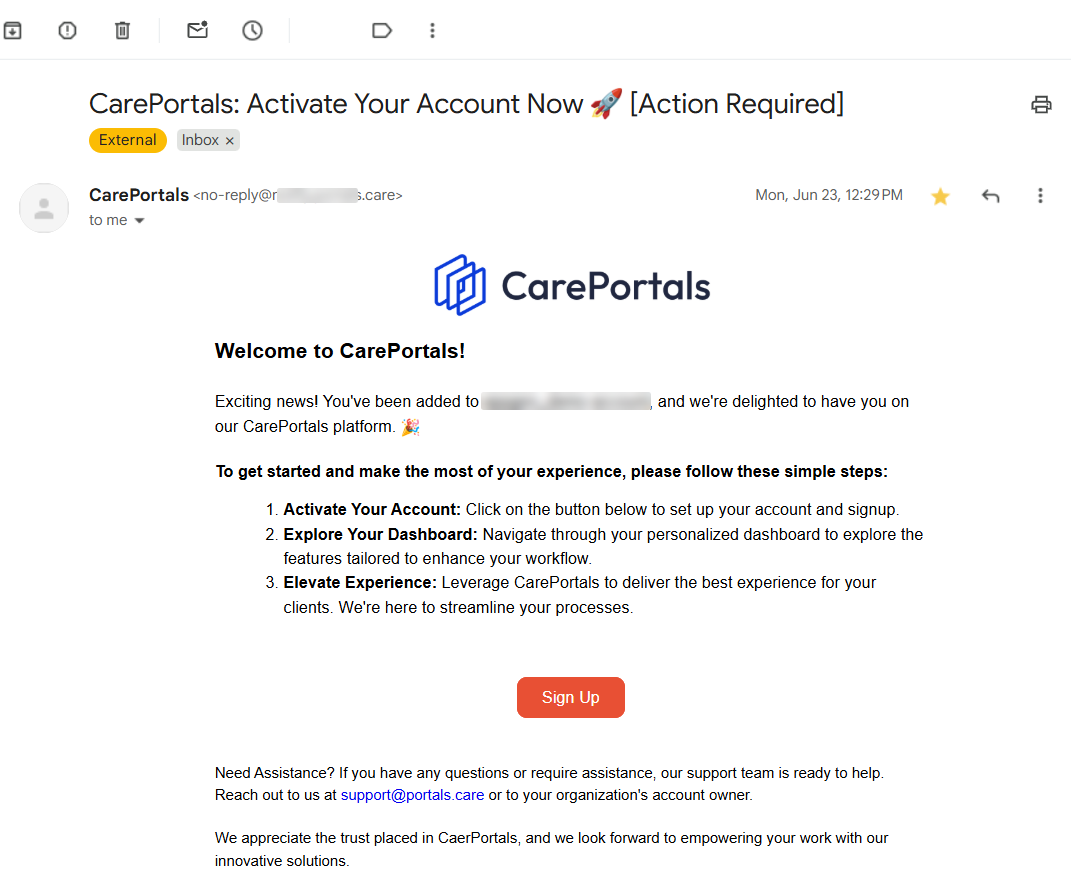
After being added, the new team member will receive an email prompting them to activate their account.
Edit a Team Member's Role/Group/Personal Information
If a team member's responsibilities change, you can easily update their role and other details:
Navigate to Admin and then select Users.
Find the team member in the user list.
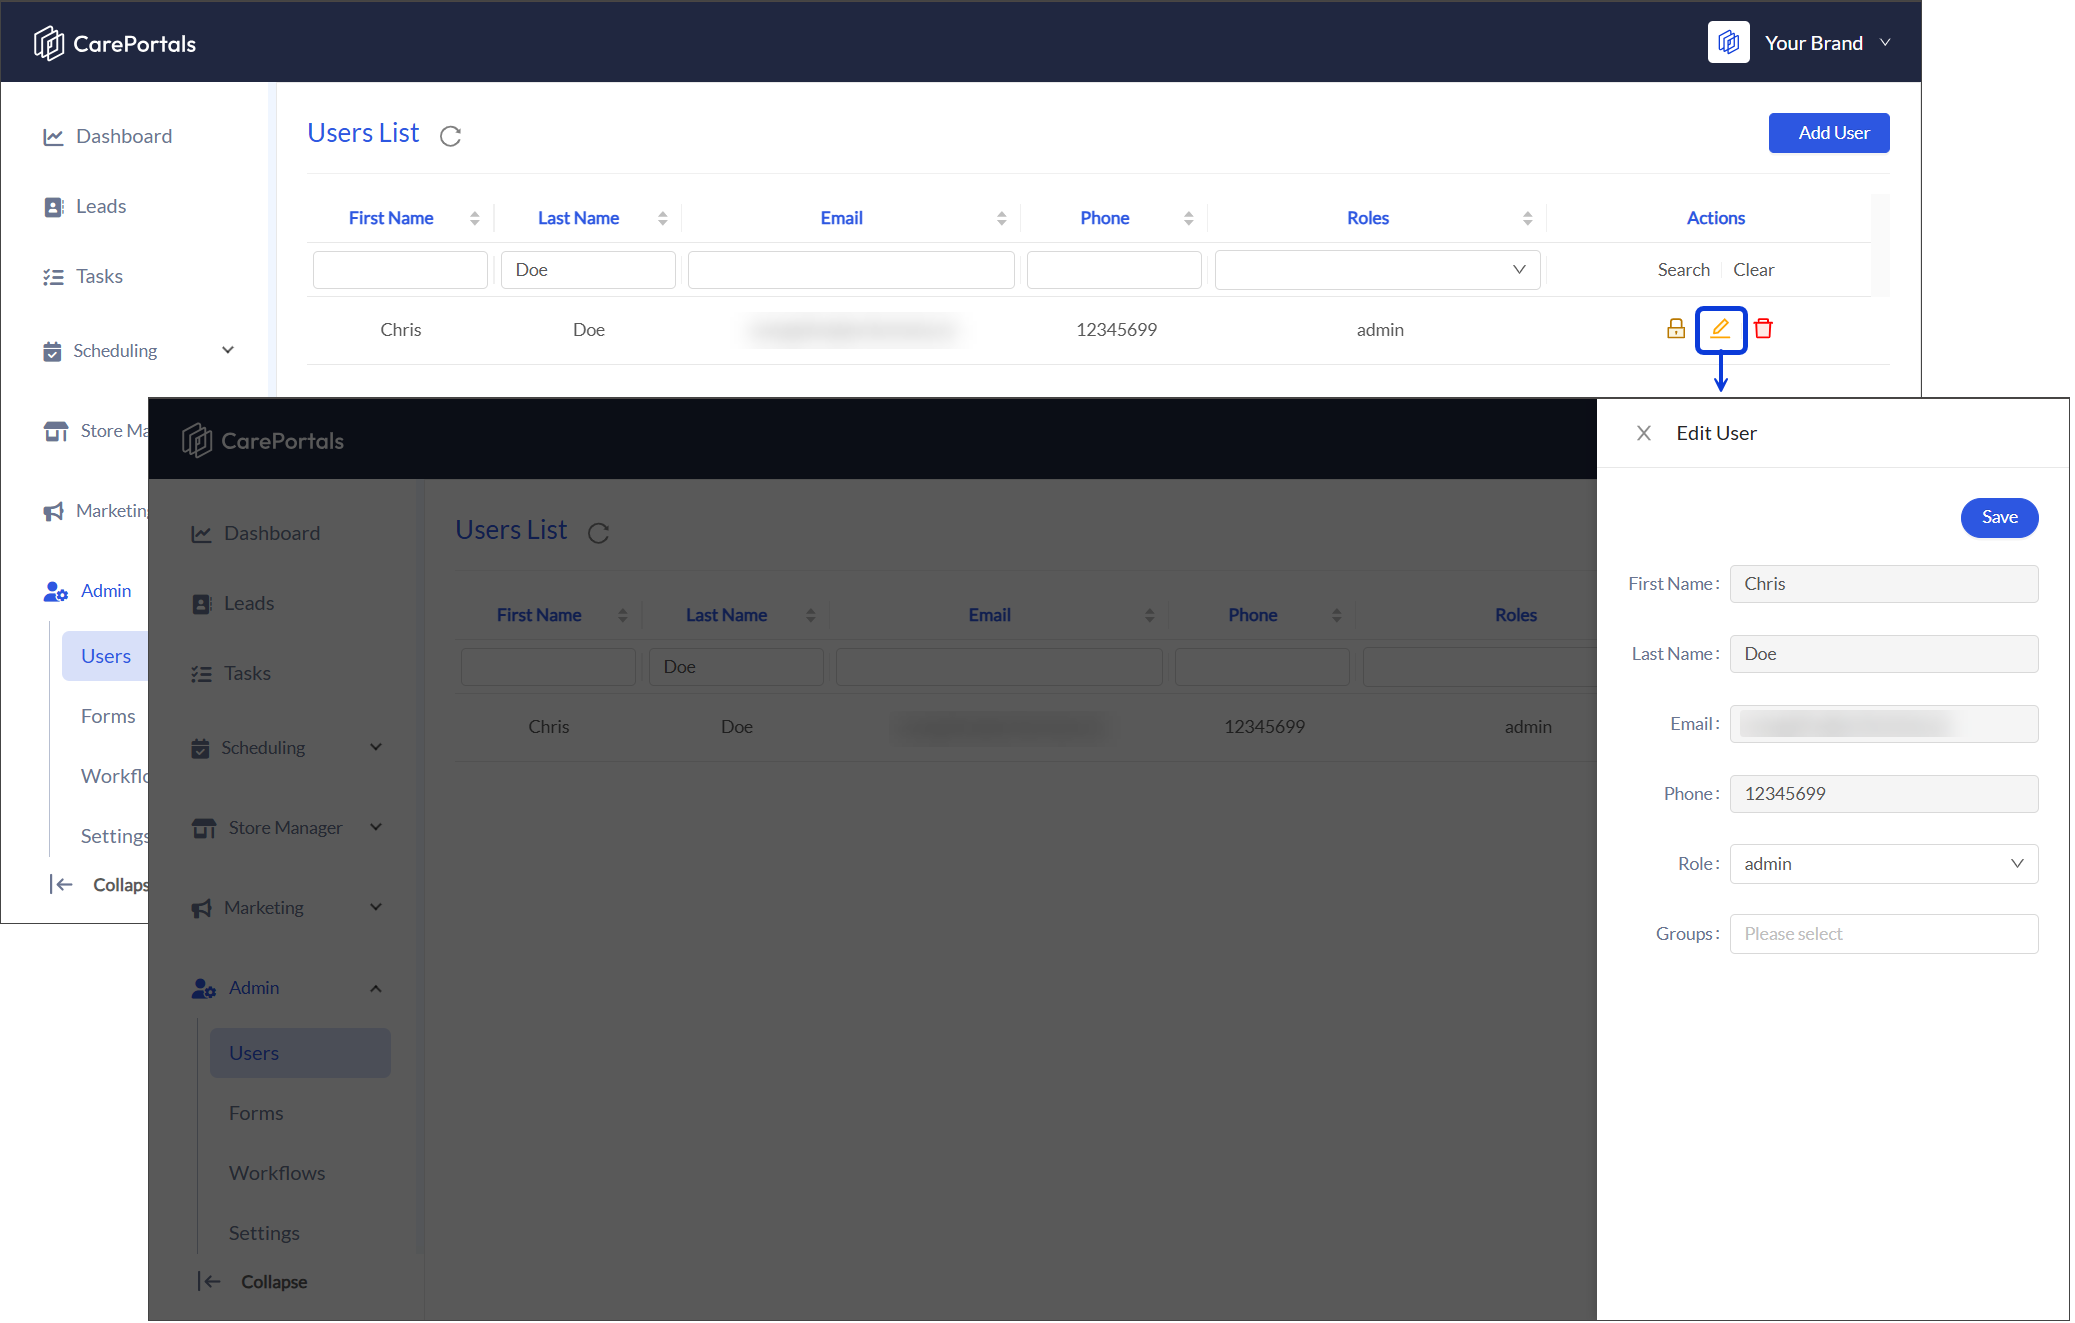
In the Actions column, click the pencil icon to edit the user.
In the Edit User lateral window, you can update the user's name, email, phone number, group, and role.
Click Save to apply the changes.
Remove a Team Member
When a team member no longer requires access to CarePortals, you can remove their account.
Go to the Admin section in the CRM Portal and select Users.
Locate the user you wish to remove from the list.
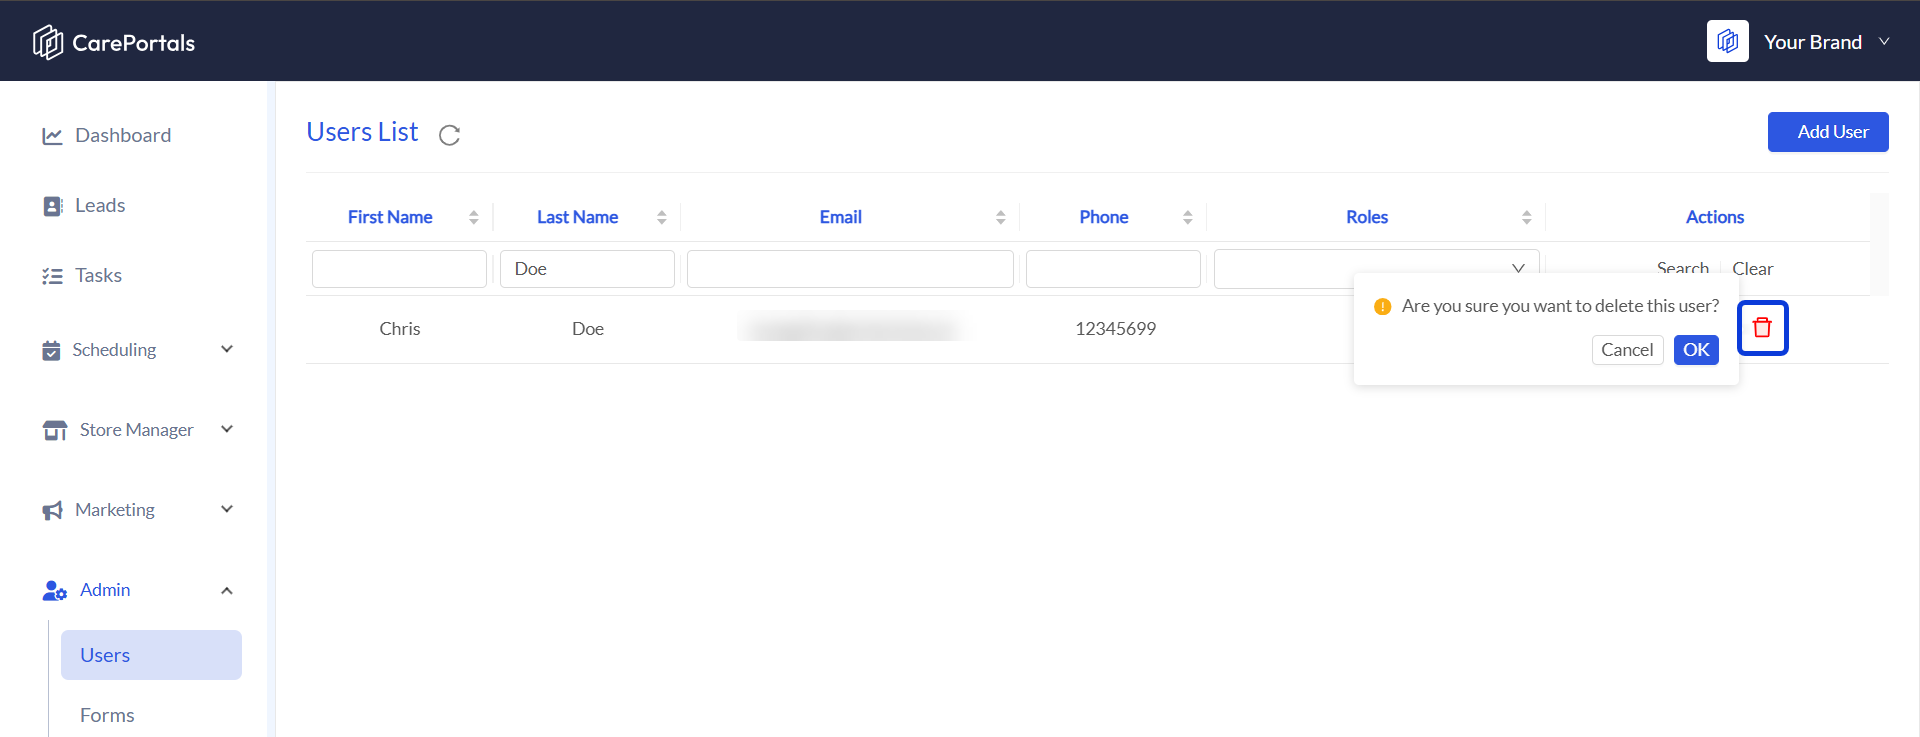
In the Actions column, click the trash can icon.
Confirm the removal by clicking on OK. The user will no longer be able to access your organization's portals.
Next Steps
After setting up your team, these guides will help you with the next steps in configuring your portal:
User Roles and Permissions: Get a detailed breakdown of the default permissions for each user role, such as Admin, Provider, and Marketing.
How to Reset a Team Member's Password: Learn how an admin can help a team member who has forgotten their password by sending a reset with a temporary password.
The Workflow Automation Engine (Explanation): Discover how to automate processes using triggers, conditions, and actions within the CRM Portal.