How to Manage Order Requirements (Submit Forms, Upload Files)
We understand that sometimes patients might need a little help completing their order requirements. If a patient sends their information directly to your team, such as a photo of their ID or their questionnaire answers, you can easily add these items to their profile to keep their order moving forward.
This guide will walk you through how to check what requirements are needed and then, how to submit the required forms or files on a patient's behalf. The process involves two main parts:
First, you will see what is required in the Requirements section of an order.
After that, you will add them from the Questionnaires tab in the patient's profile.
Step 1: Find the Order and Check What's Needed
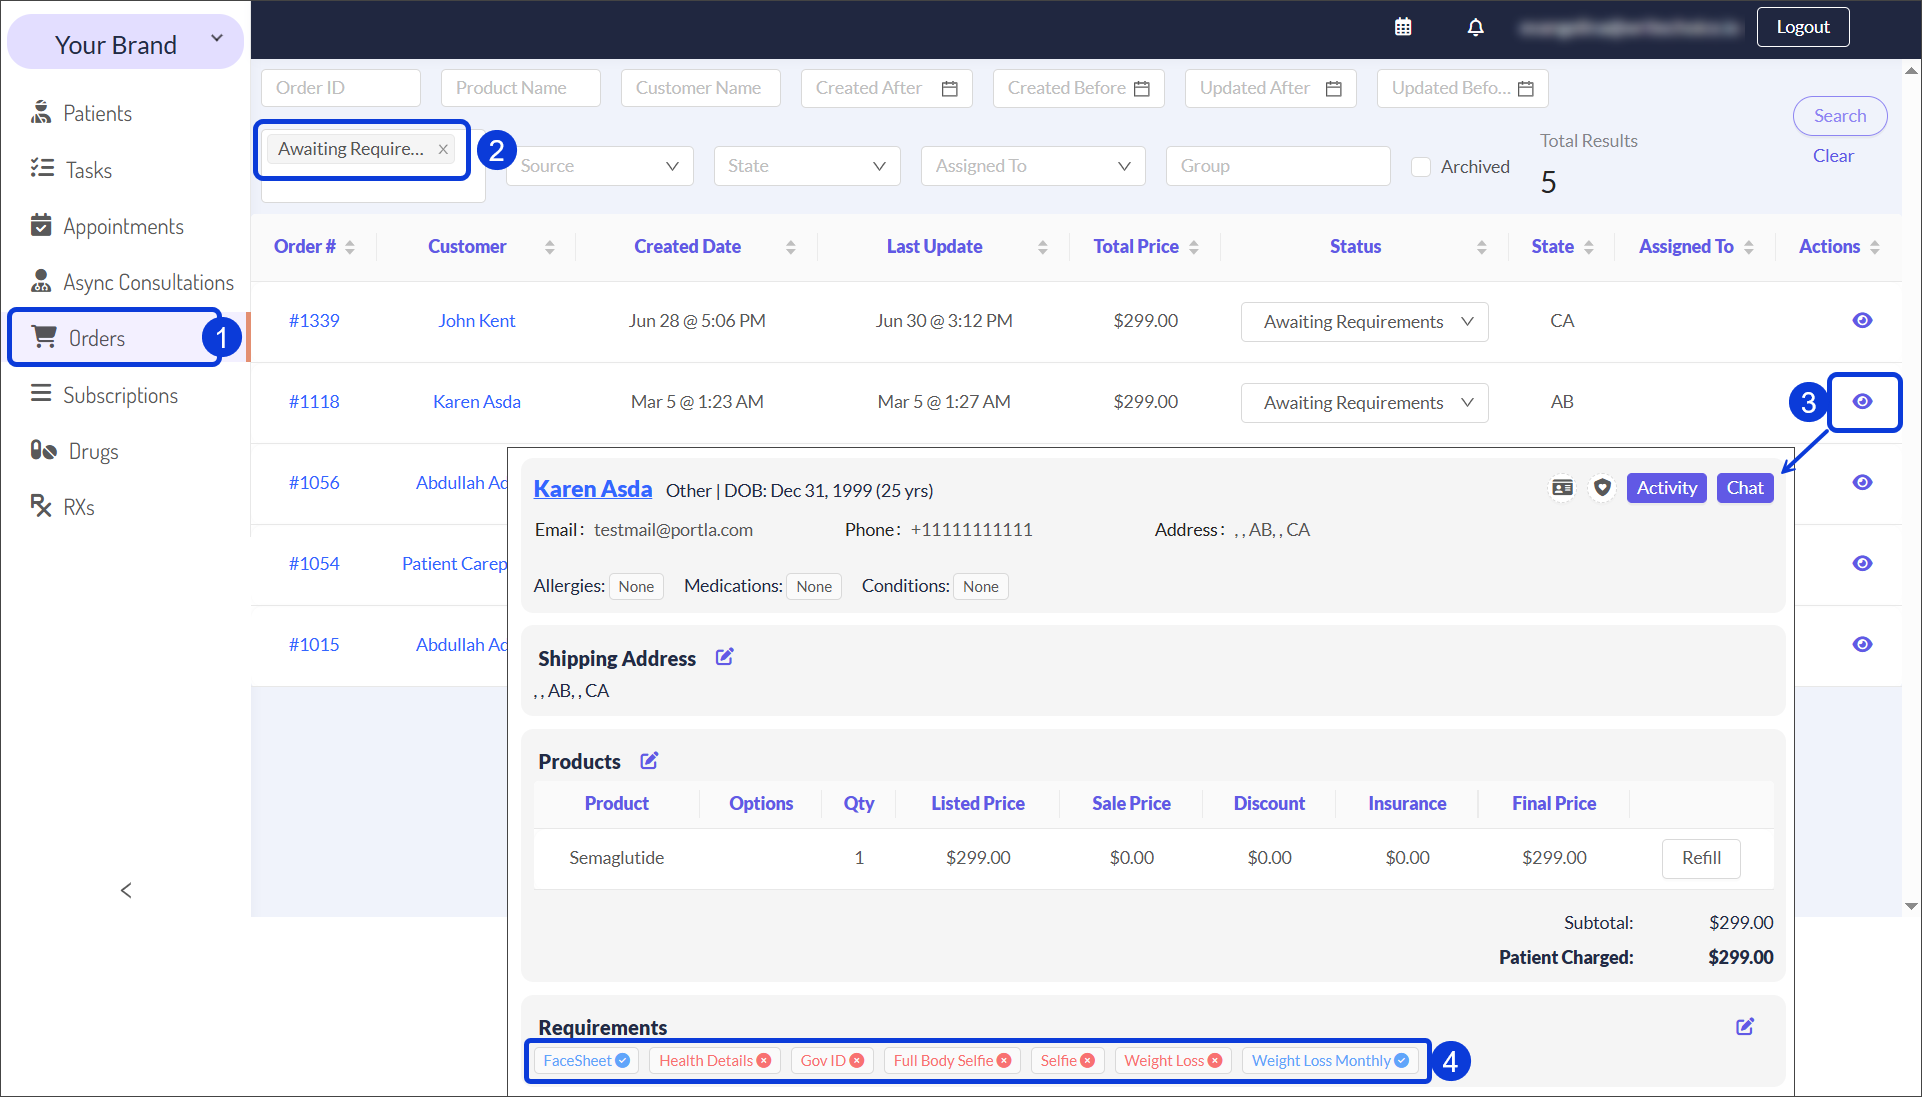
Start by navigating to Orders from the main menu in the EMR Portal.
In the list, find the patient's order. It may have the Awaiting Requirements status.
You can use the search and filter options to find an order quickly.
Open the order by clicking on its number (#) or the eye icon.
Inside the order details, look for the Requirements section. This will show you exactly which item is missing, so you know what to add next.
Missing requirements are indicated by an (X).
Step 2: Add the Requirement in the Patient's Profile
Now that you know what is needed, you can add it to the patient's profile.
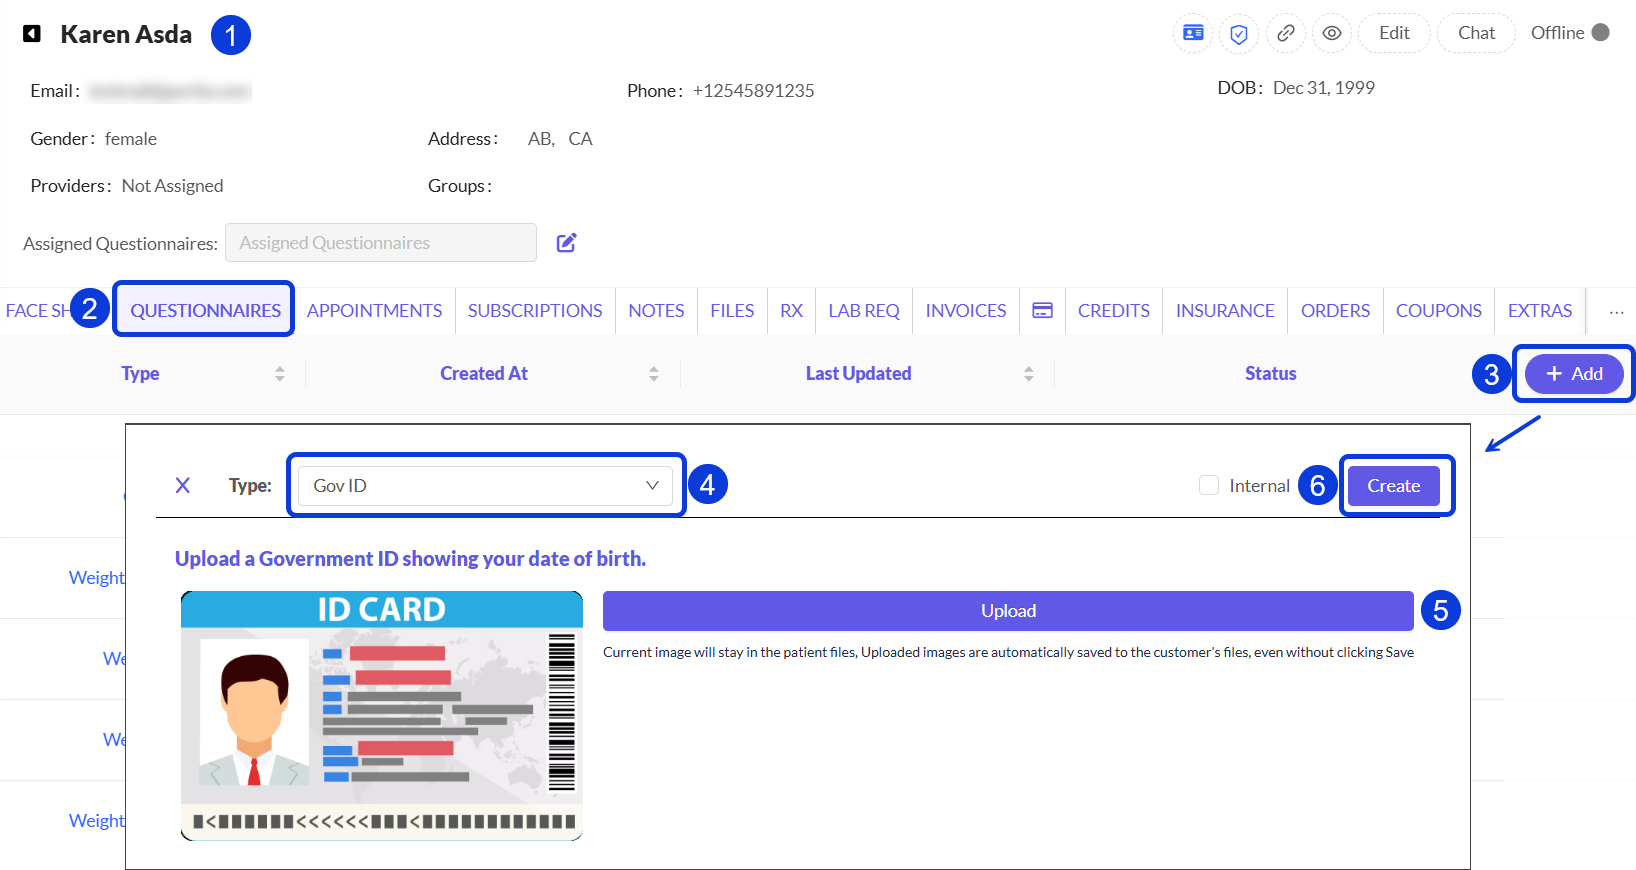
Click on the patient’s name from the order details page. This will take you straight to their profile.
Once you are in the patient's profile, click on the QUESTIONNAIRES tab. This is where all medical forms and submitted files are managed.
If the patient already has some Consultations, you will find them listed, with their corresponding Status. To Add a new one, click on the + Add button. A new window will open.
Here, select the Type of requirement you are adding (e.g., Gov ID).
Upload the file or fill in the information the patient provided.
Click Create when you are done. The new item will appear with a New-Awaiting Review status.
After you upload a file, it will become available under the FILES tab within the patient profile.
You will notice a helpful color change back in the Orders record. The requirement will turn light blue while it is awaiting review and then green once you have approved it. That is how you know it is all set!
Step 3: Confirm the Order Has Moved On
After you submit and approve all the pending requirements, change the order status to Awaiting Script to continue processing. To do that, you can just move to the Orders tab > find the correct order’s Status > change it from Awaiting Requirements to Awaiting Script.
Next Steps
Now that you know how to submit all the necessary requirements for a patient, you can explore these related guides.
Missing or Incomplete Order Information: Learn how to resolve issues when an order is stuck due to missing or incomplete information.
Order Status Definitions: Review the complete list of order statuses and what each one means.
The Patient & Order Journey on CarePortals: Get a high-level overview of the entire lifecycle of an order.