One-time Product Setup
This guide explains how to complete each field under the Product tab when configuring a product with the One Time payment option.
To learn how to configure subscriptions, see the How to Create a Subscription Renewal Reminder Guide.
Although most fields are optional, we recommend completing all relevant ones to improve outcomes and enhance the patient experience.
Table of Contents
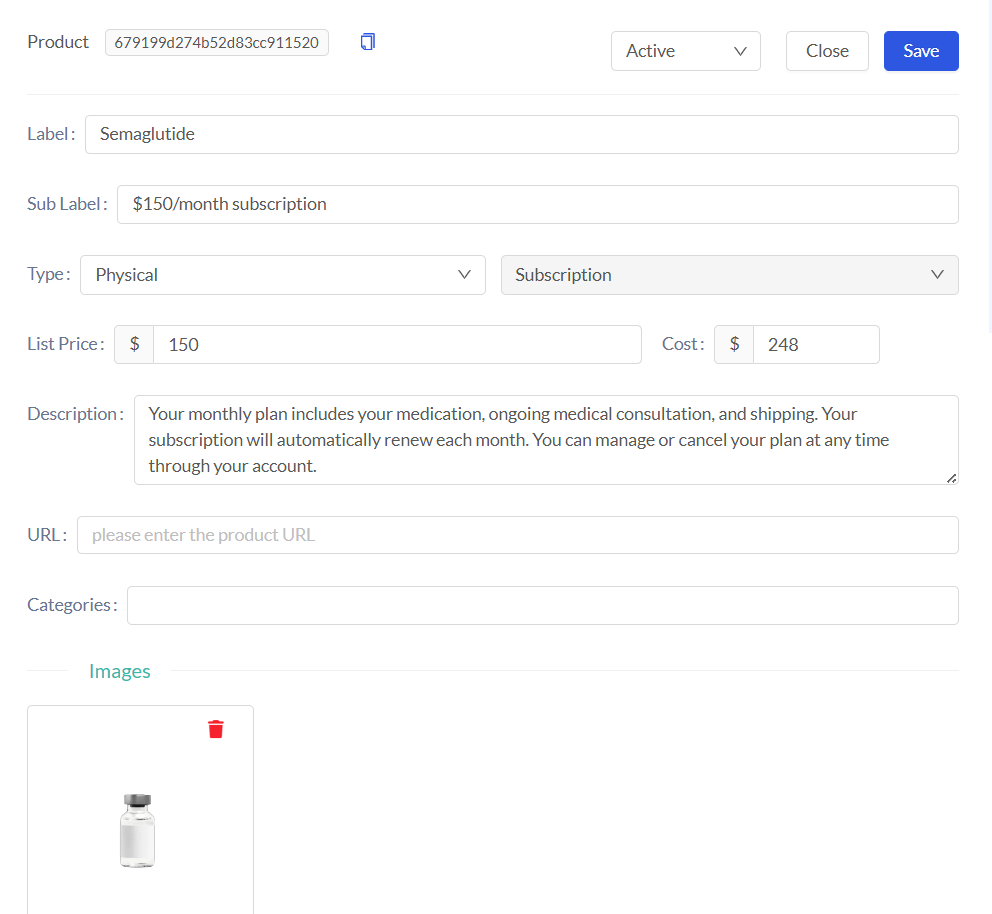
Basic Product Info
The following fields cover the essential details needed to identify and classify your product.
Specify product nature (e.g., Physical, Digital).
Define the payment structure (e.g., One Time, Subscription). |
Pricing
Use these fields to set the product's price that will be displayed and track your internal costs.
Categorization & Metadata
These fields help you organize your products and provide important context for patients.
Provider Visit Requirements
These are the prerequisites for a provider visit and are typically required only for prescription medications or products, which are configured in CarePortals during the platform's implementation phase.
You can select the necessary requirements when you create or edit a product. These requirements are then automatically assigned to any order created for that product.
The following table describes common requirements:
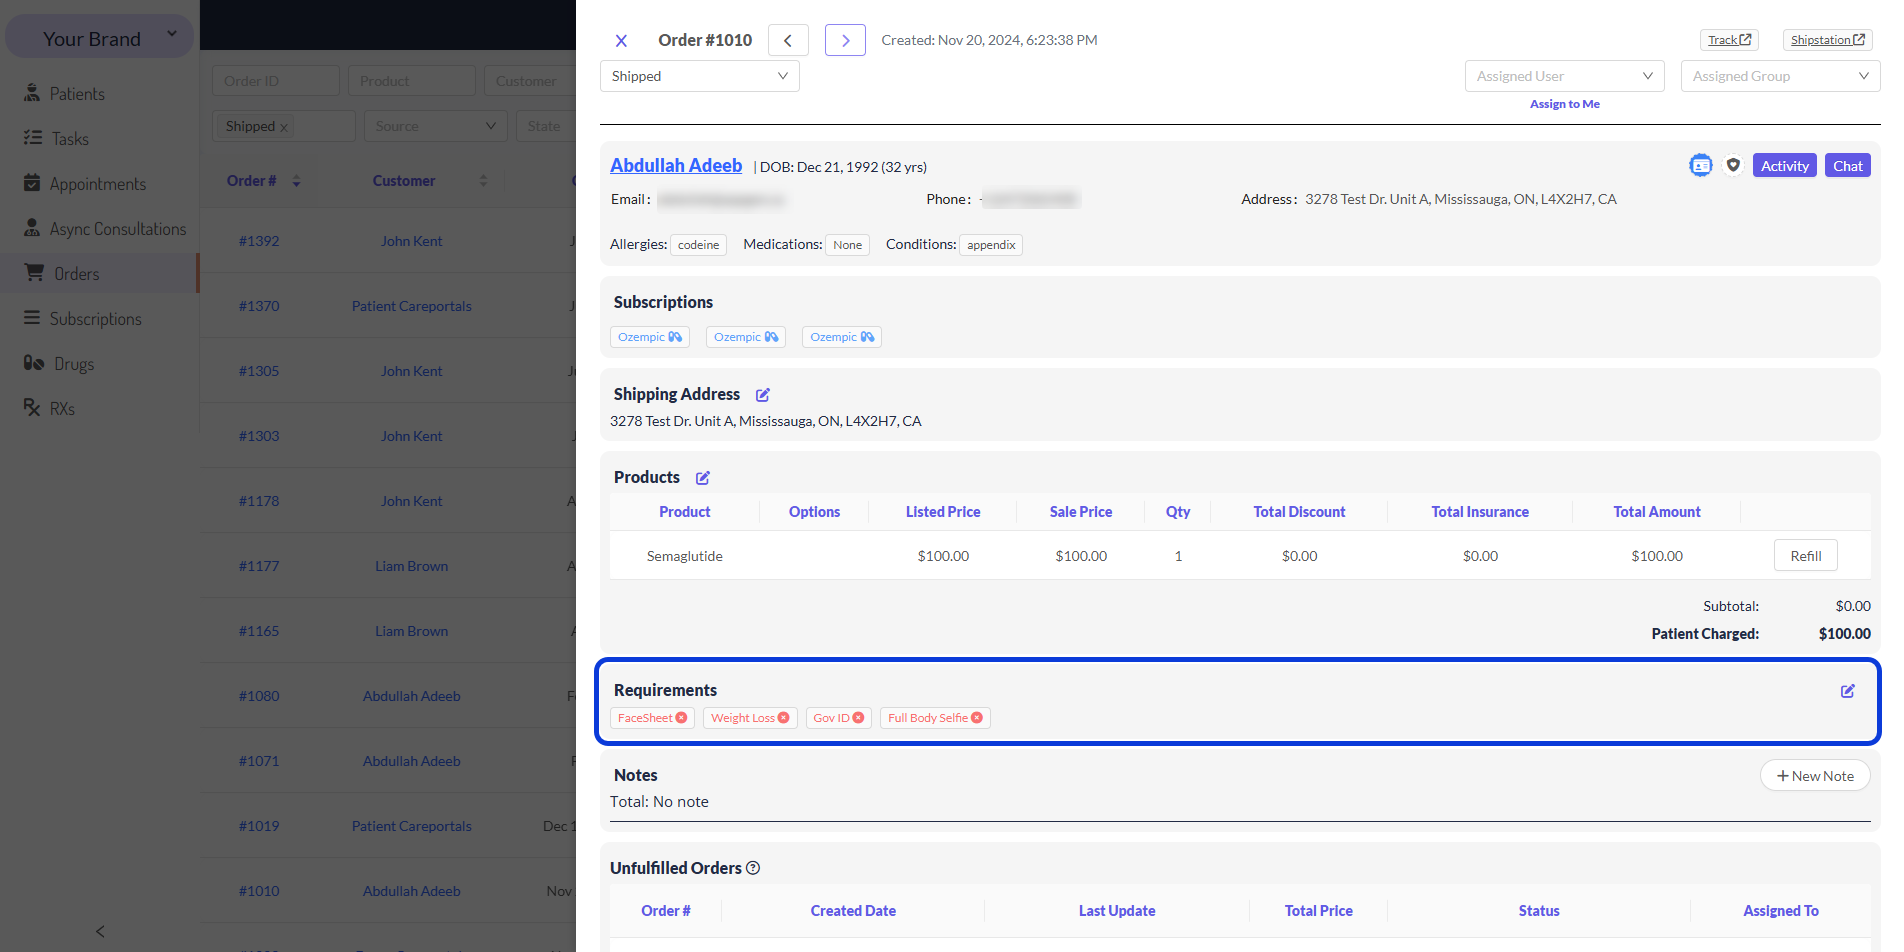
If you have the necessary permissions, and in case you consider it necessary, you may also be able to add requirements directly to a patient’s order. To do this, just click on the edit button, add the requirements, and click on Save.

Image
Add an image to be shown on cart and checkout.
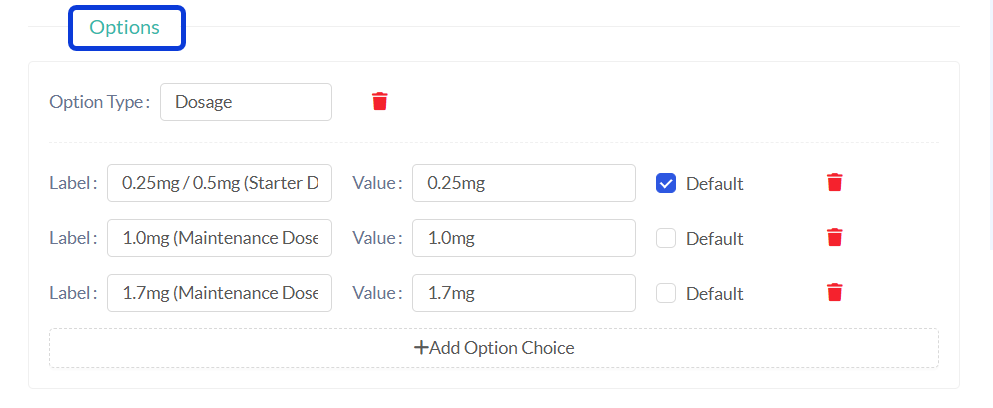
Product Options
If your product has multiple variations, like different sizes, brands, or packaging formats, you can define them here. Each variation can be set up with labels and internal references. To add a new option, use the following actions:
The CarePortals Cart handles the Product Options and Relations that you configure.
Option Choice Fields:
For each option choice you add, you will need to complete the following fields:
Related Products
You can link this product to others in your catalog to create suggestions, bundles, or alternatives. This improves patient discovery and encourages higher-value purchases.
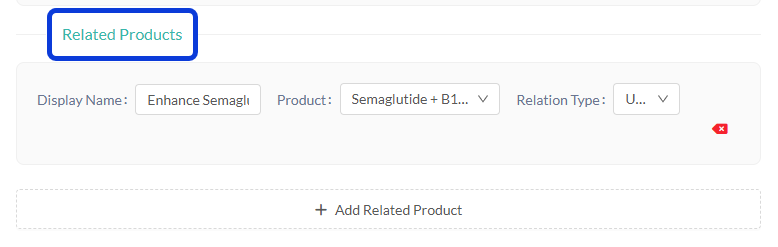
Relation Type Options:
There are three types of relations that can be established:
Variant: Represents different versions of the same core item, such as different package sizes or subscription frequencies. For instance, to set up a 3-month supply variant for a 1-month supply of Finasteride, you would fill in the fields like this:
Display Name: 3-Month Supply
Product: Finasteride - 3-Month Supply
Relation Type: variant
Upsell: Recommends an additional, distinct product that complements the item the patient is currently viewing, with the goal of increasing the overall cart value. For example, to recommend a complementary shampoo with a Finasteride prescription, you could configure it as follows:
Display Name: Add Hair Thickening Shampoo
Product: Ketoconazole Shampoo
Relation Type: up-selling
Cross-Sell: Suggests a different, often higher-value or alternative, version of the product the patient is about to purchase. You can use this to encourage a long-term treatment plan with a subscription that includes a kit, rather than a single one-time purchase. For example, to suggest a complete hair loss subscription kit instead of just a single bottle of Finasteride, your setup would look like this:
Display Name: Commit to results with our monthly treatment kit
Product: Hair Loss Treatment Kit (Subscription)
Relation Type: cross-selling
Extras
This section is for attaching custom data to a product for special use cases, like integrations with Webhooks and APIs, automation, or fulfillment systems.
This section contains a single field for advanced use cases:
This field gives you the flexibility to handle information that does not belong in the standard fields. For example, you can add a JSON object with external IDs to link the product to other platforms.
{ "bigcommerceId": "abc-123-xyz-789", "stripePriceId": "price_1PFl_nJ2eZvKYlo2ChxKk9wLq" } You can also use this field to define special rules that external systems can act on. In the following example, the data specifies which partner pharmacies should include an injection kit with the product.
{ "bigcommerceId": "abc-123-xyz-789", "stripePriceId": "price_1PFl_nJ2eZvKYlo2ChxKk9wLq", "includeInjectionKit": [ "pharmacyHub", "ValiantRx", "UKPharmacy" ] } Next Steps
Now that you understand how to configure the fields for a new product, here are some guides to help you continue setting up your brand.
Understanding Promotions vs. Coupons: Learn the difference between these two terms and how/when to use each of them.
How to Create a Coupon: After creating a product, a logical next task for an administrator or marketing user is to create promotions. The documentation outline includes a specific guide for creating and configuring discount coupons with rules and limits.