Send a Visit Request to Beluga Workflow
The following tutorial shows how a Trigger, a CRM Action, and an Adapter can work together to automate a core clinical scenario, sending a new visit request to the Beluga physician network when a patient's order is ready for a prescription.
This workflow is essential for digital health brands that partner with the Beluga external physician group. It automates the handoff from order processing to clinical review, ensuring that a doctor is notified to write a prescription.
Workflow Overview
This automated workflow consists of three key parts that run in sequence. Here’s a quick look at what you'll build:
Trigger: The workflow will kick off automatically the moment the patient has successfully submitted all their required questionnaires.
CRM Action: An email is immediately sent to the patient to confirm their submission is received and is now pending a doctor's review.
Adapter: The workflow then sends the necessary order details to the external Beluga platform, which formally creates the visit request for a physician.
Step 1: Set the Trigger
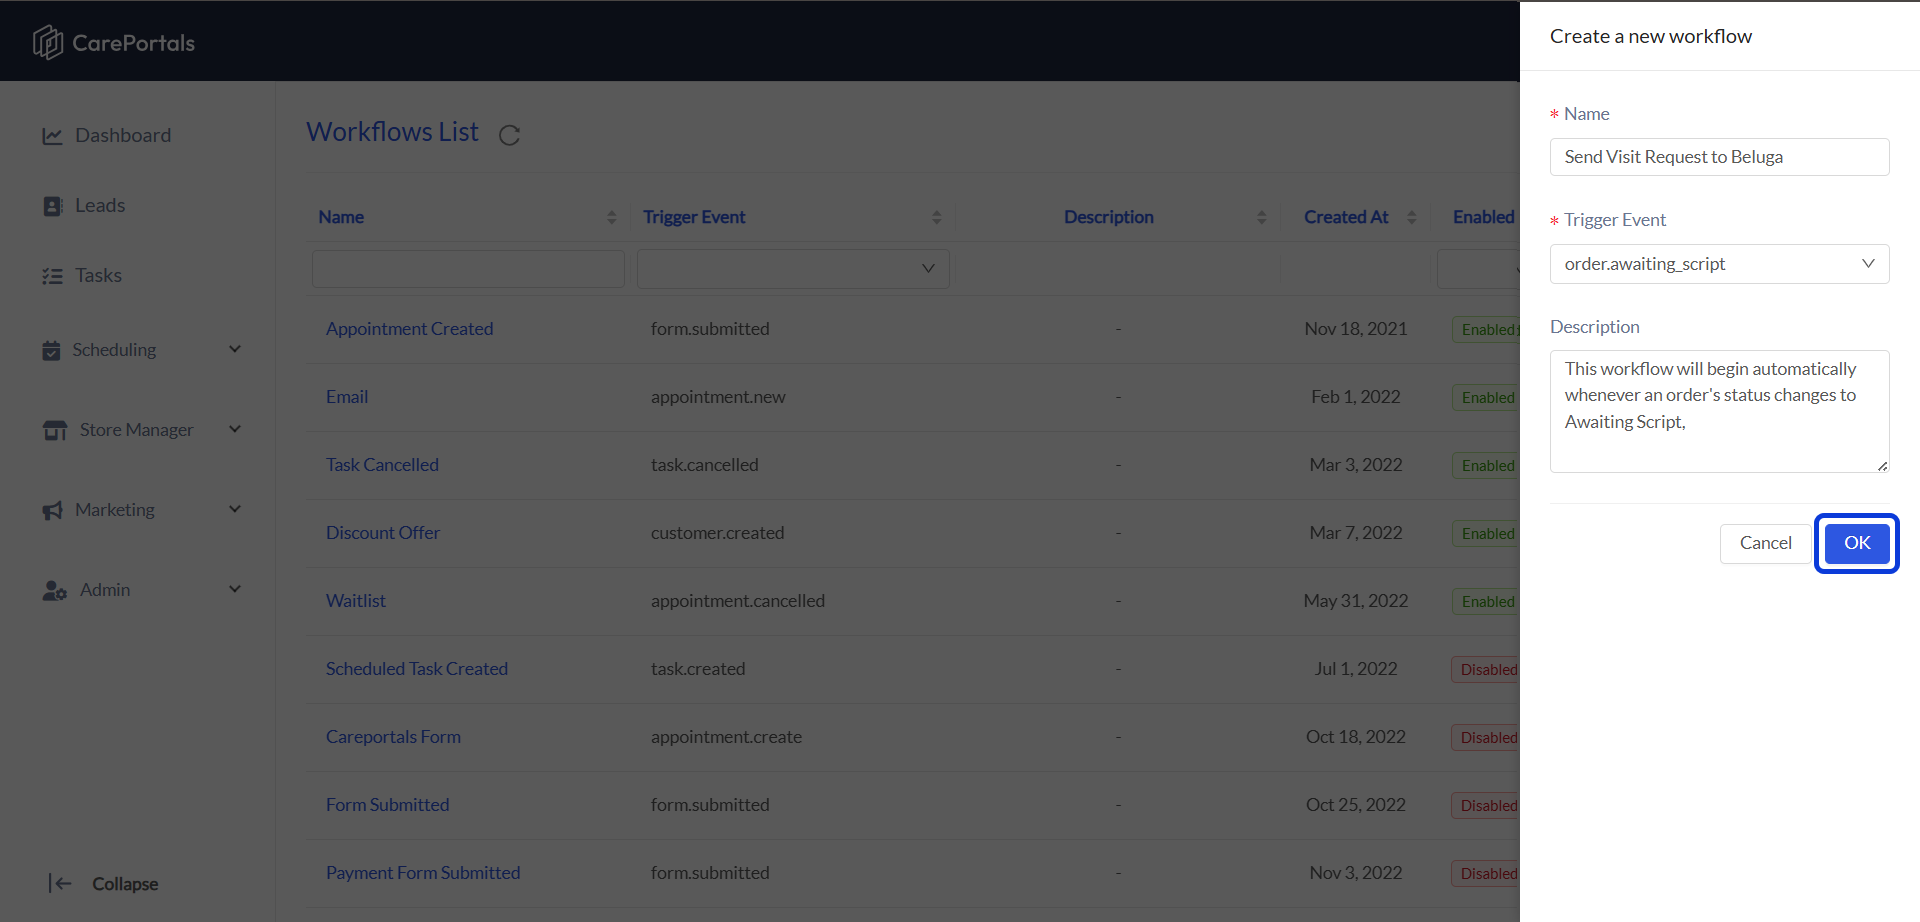
Create a new workflow by navigating to CRM Portal > Admin > Workflows > Create Flow.
Add a Name (e.g., "Send Visit Request to Beluga") and set the Trigger Event as
Order.awaiting_script.
This workflow will automatically trigger whenever an order's status changes to Awaiting Script. This status is set once the patient has successfully completed all required questionnaires.
Click on OK to save the new workflow. Then, open it to start its configuration.
Step 2: Notify the Patient (CRM Action)
Before sending the request to the integrated physician group, you can add a step to automatically send an email to the patient. This action lets them know their order is processing successfully and the submitted information are now waiting for a doctor's review.
Here are the setup instructions:
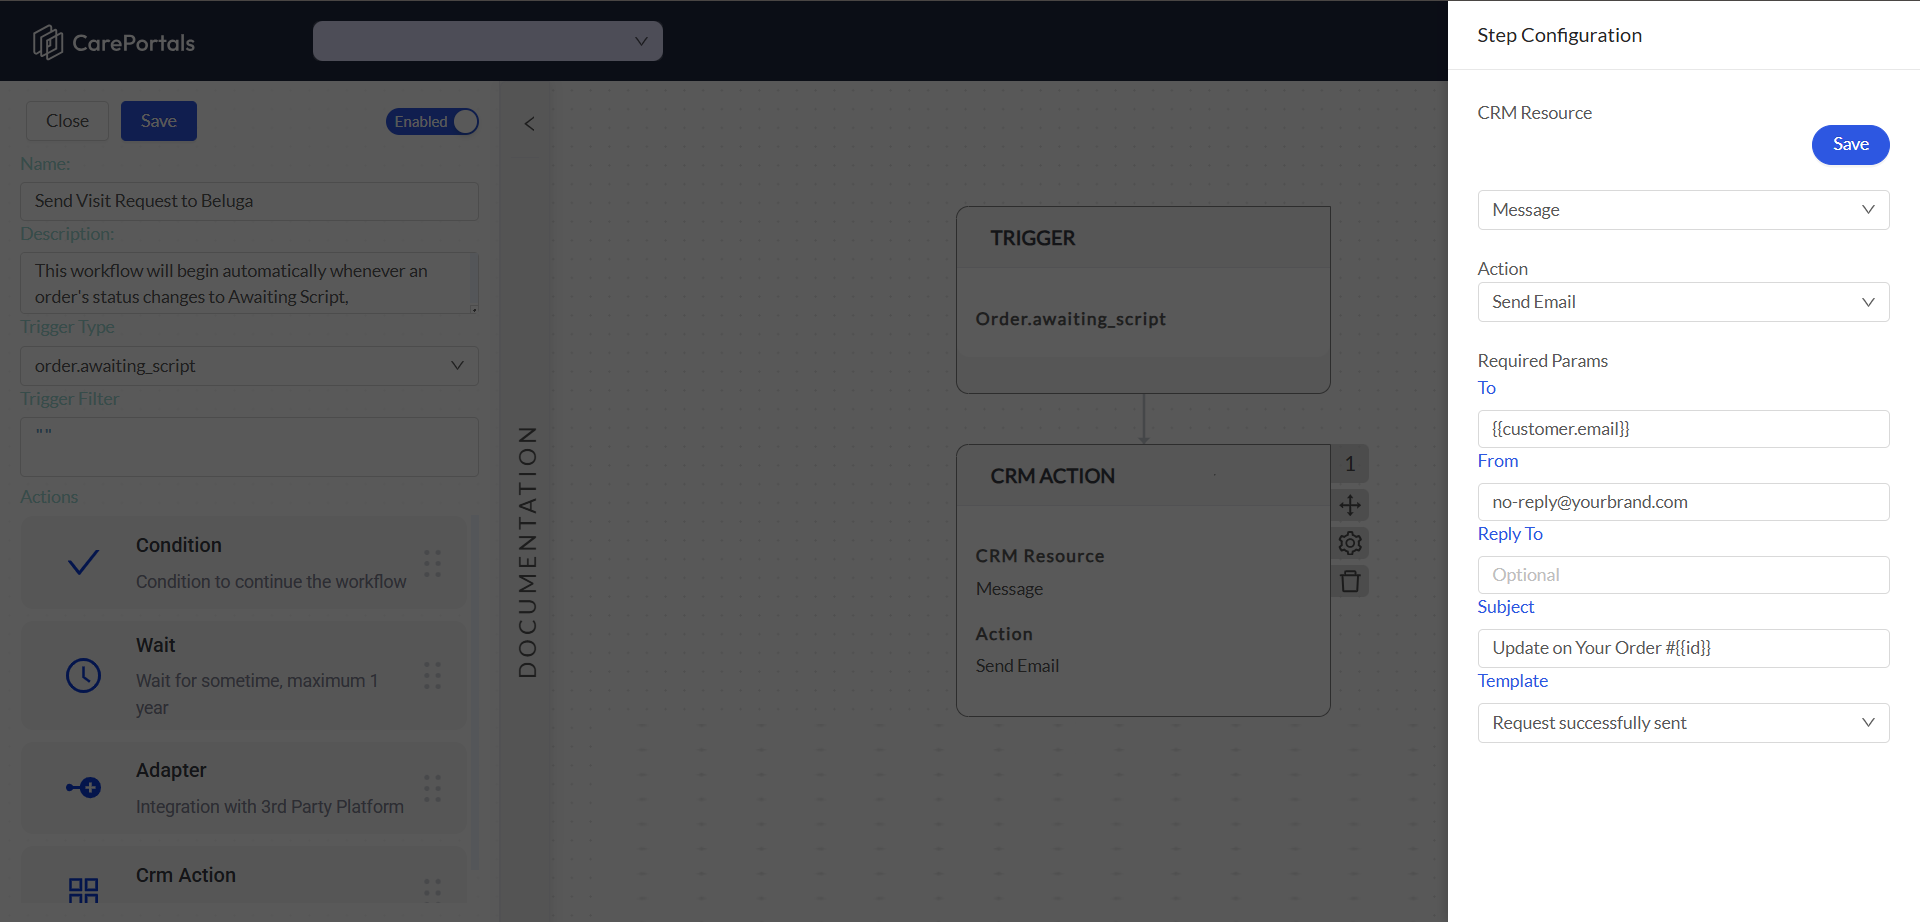
Add a CRM Action step to your workflow after the trigger.
Set the following options:
CRM Resource: Select Message.
Action: Select Send Email.
Here is an example of how you can configure this CRM Action:
In this example, {{customer.email}} and {{id}} are dynamic variables. They automatically pull the patient's email address and the specific order ID from the order that triggered the workflow, personalizing the message for each patient.
You should create the email template beforehand from the Templates menu. To learn how to create it, read the How to Create Templates article.
Step 3: Send the Visit Request (Adapter)
This step uses an Adapter to send the patient's information and visit requirements to the Beluga platform, which formally creates a visit request for one of their physicians to review.
Setup Instructions:
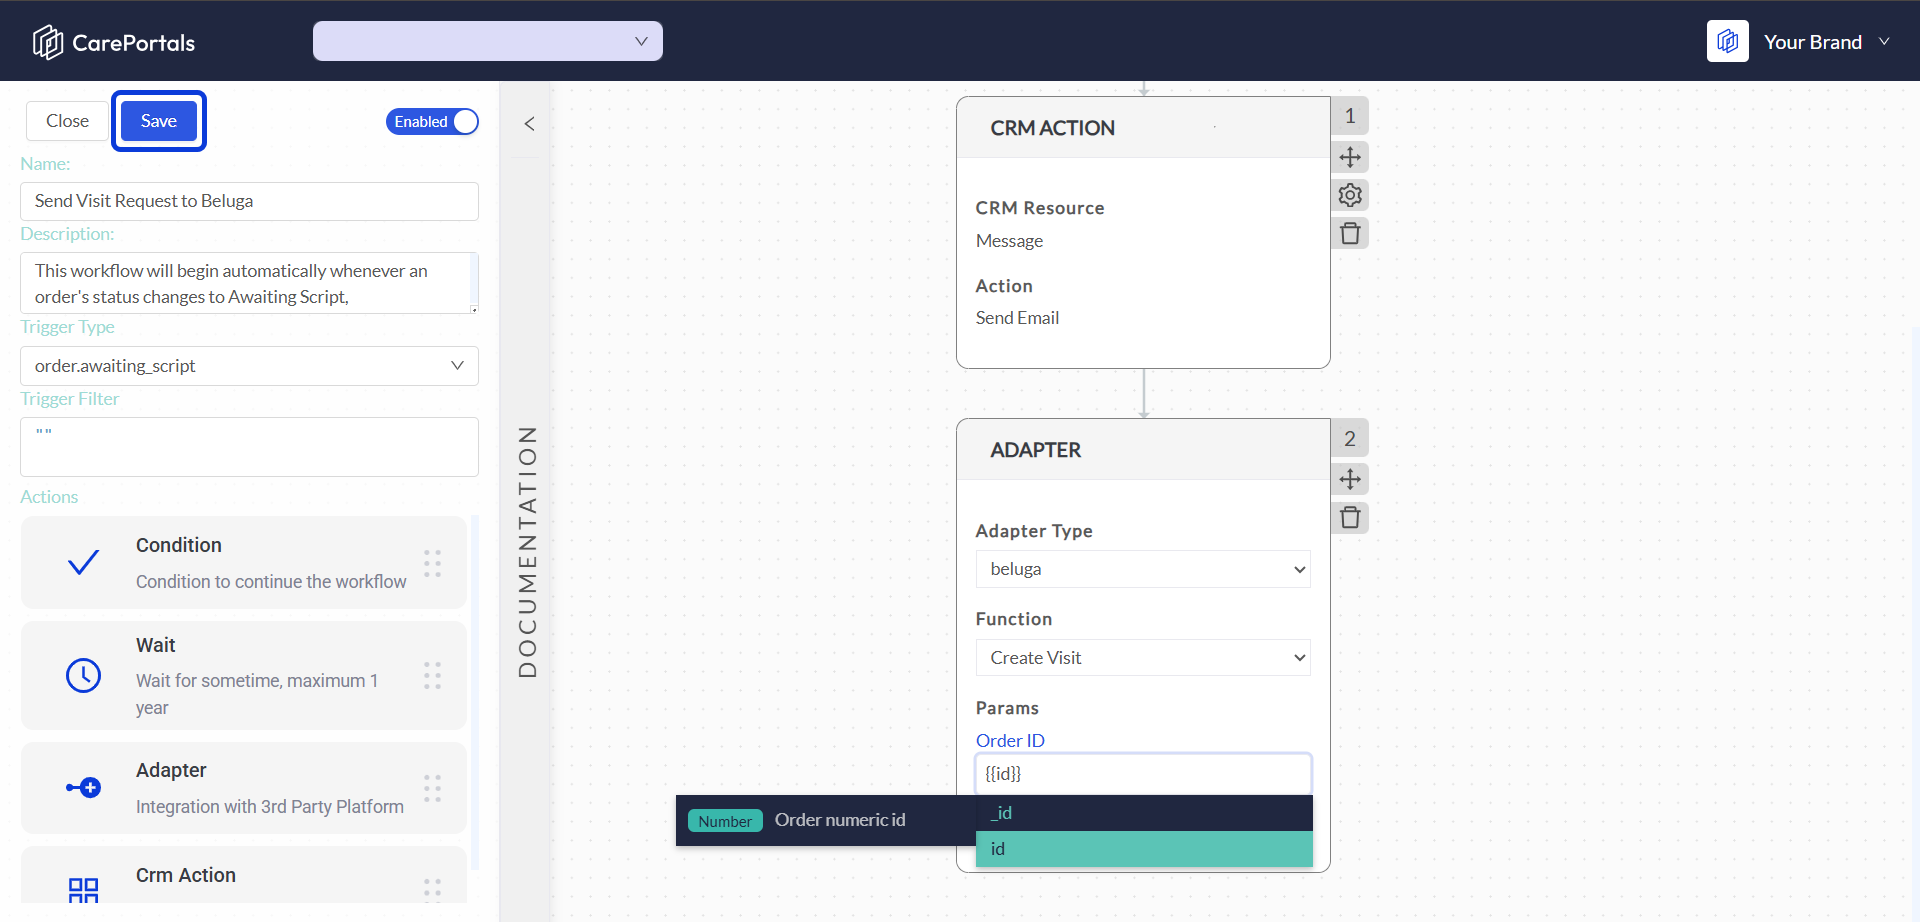
Add an Adapter to your workflow after the trigger.
Set the following options:
Adapter Type: Select Beluga from the list. This tells the workflow which external platform to connect with.
Function: Select Create Visit. This tells the Beluga adapter which specific action to perform.
In the Parameters section, you must map the order data from CarePortals to the corresponding field(s) required by Beluga. The Value for the available parameter will be a dynamic variable that pulls data directly from the order that triggered the workflow.
Here is an example of how you would map the fields:
The adapter retrieves CarePortals order ID and sends it to Beluga to create a new telehealth visit.
Click Save. If your workflow is Enabled, it will start running.
Next Steps
If you are interested in learning how to create other types of workflows, you can check the following guides.
Send a Slack Notification for New Patient Messages Workflow: Learn how to use webhooks to connect to other platforms.
Add a New Patient to a HubSpot Marketing List: Learn how to automatically add new patients to your marketing lists.
How to Create a Subscription Renewal Reminder: Learn how to automatically send SMS reminders to patients before their subscription renews.