GTM: Setup Tracking Scripts
Understanding how users interact with your checkout flow and patient portal is key to continuously improving your services and marketing efforts.
In this guide, we’ll walk you through tracking the core events using Google Tag Manager (GTM), from landing on your patient portal to completing a purchase through CarePortals checkout.
This helps you answer high-impact questions like:
Which marketing channels drive the most conversions?
How many users start vs. complete a purchase?
How long does it take users to complete a checkout?
What’s the average order value by campaign or source?
Google Tag Manager (GTM) is a powerful tool for managing analytics and marketing tags across your site, no code changes required. If you are new to GTM or want to learn more, a great place to start is Google’s official Introduction to Tag Manager guide.
Portals Page View
The Page View configuration tracks page views that occur within CarePortals. It allows you to trigger specific marketing or analytics actions based on the exact pages your patients visit. With this information, you can:
Analyze user journeys.
Group users who visit a specific page but do not complete an action.
Use a page view as a condition to fire other scripts.
To set it up in Google Tag Manager, create a new trigger with the following settings:
Trigger Type: Custom Event
Event Name:
Page ViewActivation Conditions: This trigger fires on All Custom Events.

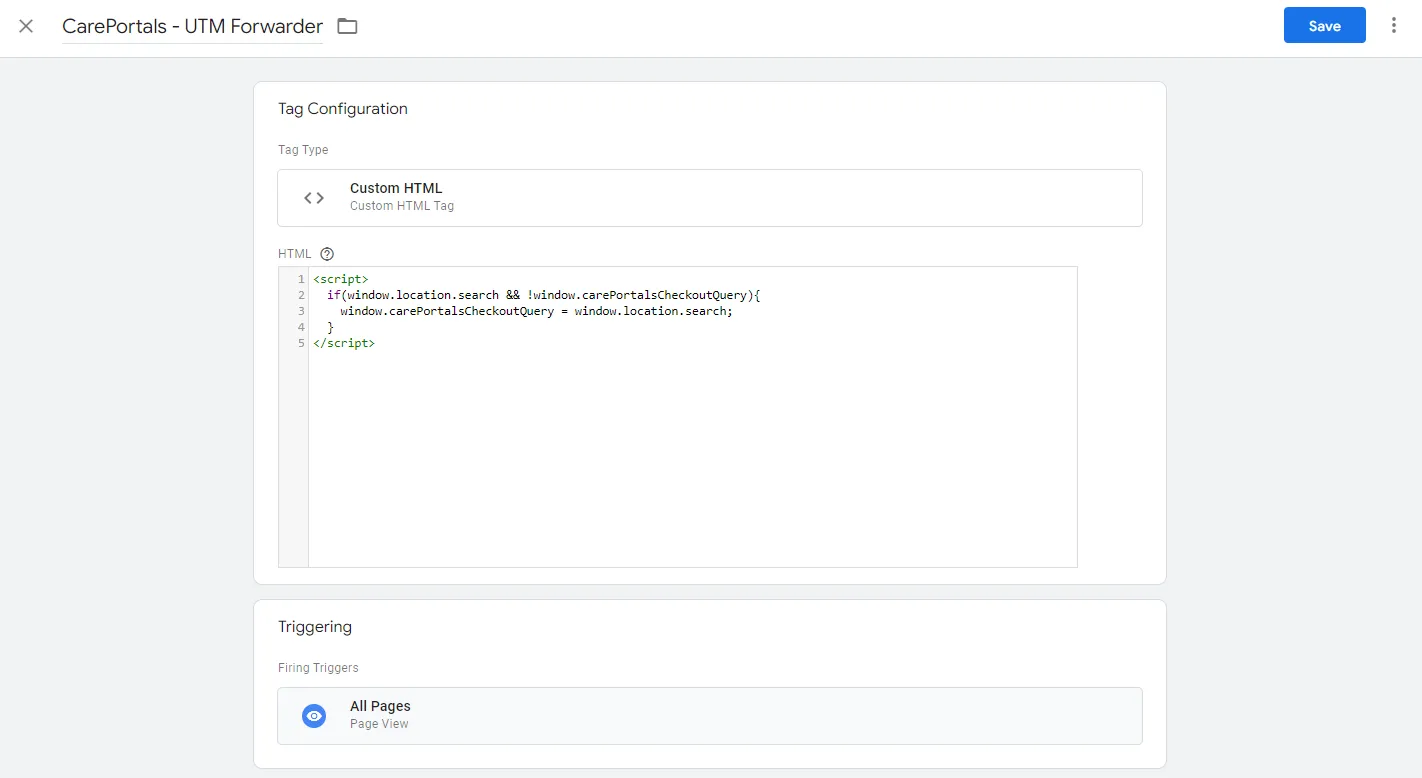
Session Linker
To make sure you can see where your users are coming from, like a specific email or ad campaign, you need to pass tracking information from your website to the CarePortals checkout. You need to use a script that will capture URL parameters, such as UTM tags, and carry them through the entire process.
To set it up, you need to add the following script to your website.
<script> if(window.location.search && !window.carePortalsCheckoutQuery){ window.carePortalsCheckoutQuery = window.location.search; } </script> If you use Google Tag Manager, you can set this script to fire on all pages. This ensures the tracking information from your landing page is passed along with the final purchase event.
Checkout Started
The Checkout Started event helps you track when a user begins the checkout process. It is useful for identifying users who start to buy but do not finish, helping you identify abandoned carts.
To set it up in Google Tag Manager, create a new trigger with the following settings:
Trigger Type: Custom Event
Event Name:
interactionActivation Conditions: This trigger fires on "Some Custom Events" when:
Event.actioncontainscheckout-startedEvent.targetcontainscheckout
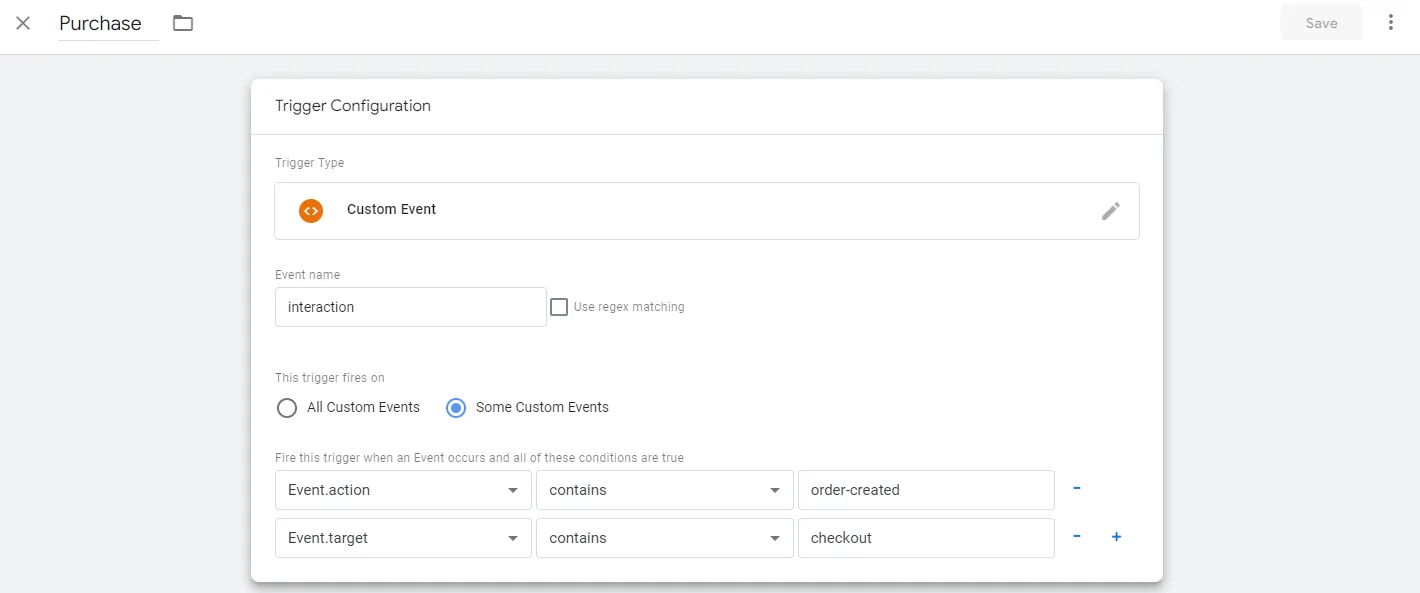
Conversion (Purchase) Event
The Conversion event is the most important step for tracking a successful purchase. This trigger fires only when a user completes a transaction, allowing you to measure your conversion rate.
To set it up in Google Tag Manager, create a new trigger with the following settings:
Trigger Type: Custom Event
Event Name:
interactionActivation Conditions: This trigger fires on "Some Custom Events" when:
Event.actioncontainsorder-createdEvent.targetcontainscheckout

To see the events and example payloads sent from the patient portal, you can refer to our Patient Portal DataLayer Events guide.
Related Articles
Want to learn more? Check out these related articles for deeper setup tips and advanced customizations.
Patient Portal DataLayer Events: Track patient portal interactions with GTM.
How to Embed the CarePortals Cart: Step-by-step guide to add the cart to your site.
Skip the Cart: Set Up a Buy Now Button for Instant Checkout: Let users skip the cart and checkout instantly.