How to Create a Promotion
Promotions allow you to offer automatic discounts to your patients without requiring them to enter a code at checkout. Unlike coupons, which require a specific code, promotions are applied automatically when the criteria are met.
This guide walks you through the steps to create and configure a new promotion.
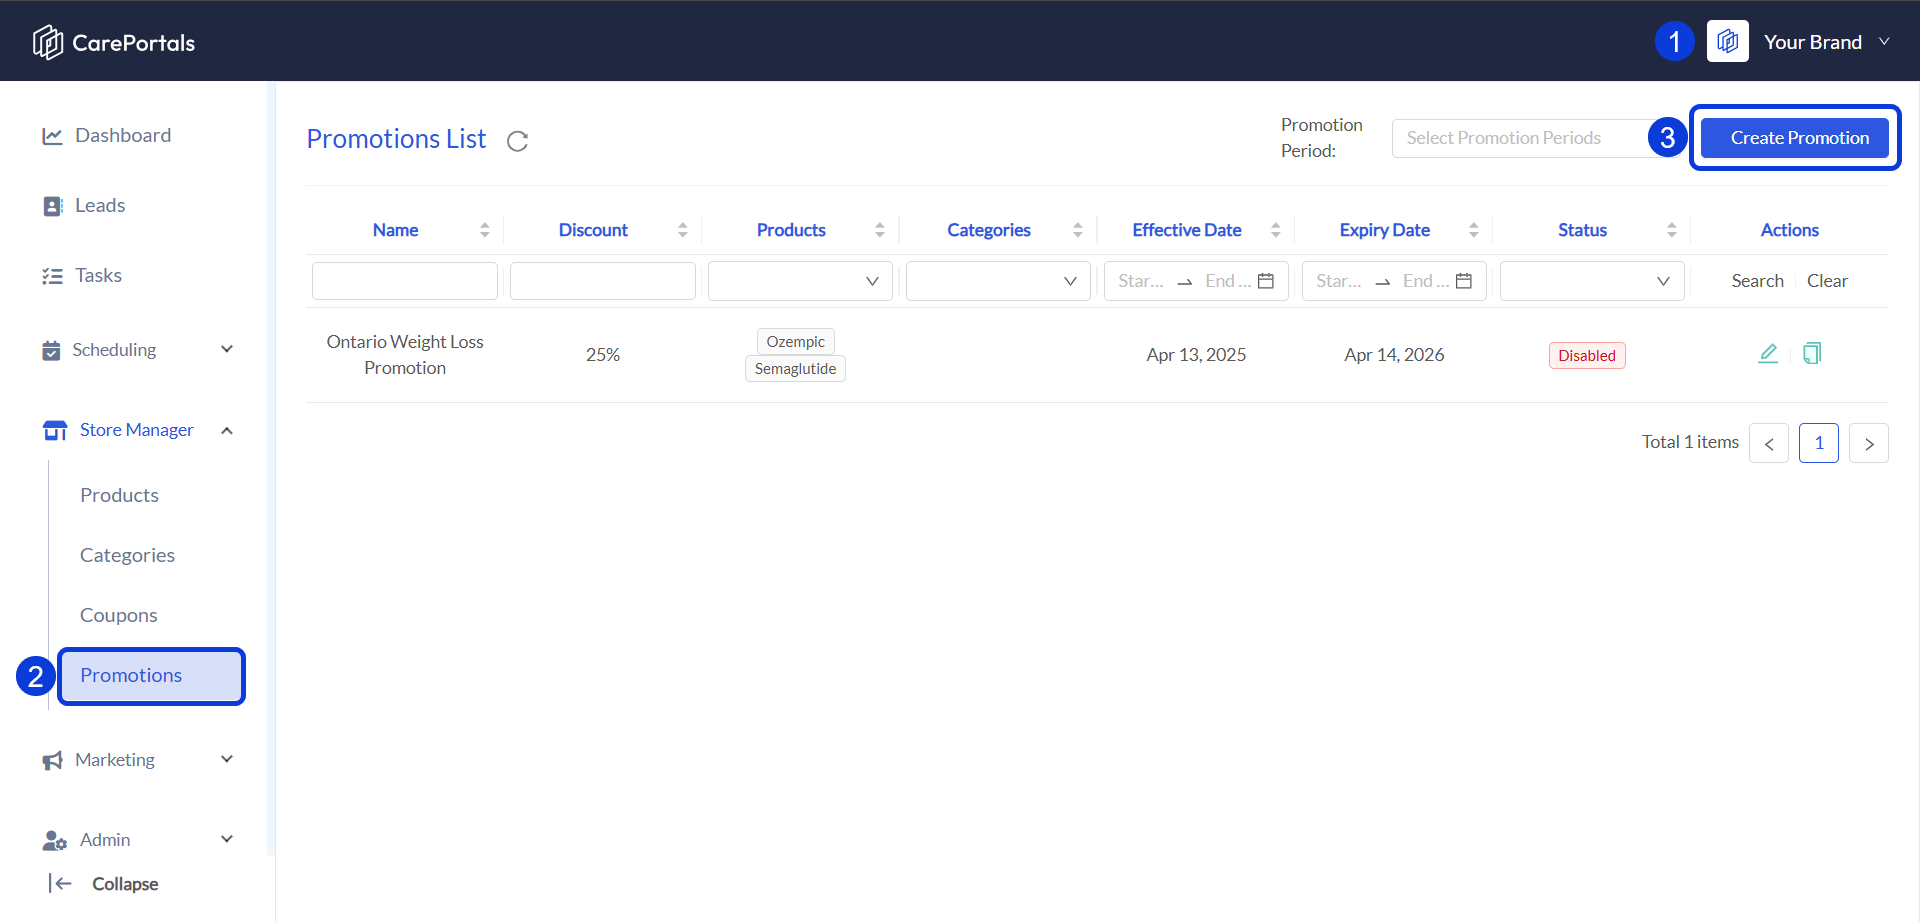
Create a Promotion
Log in to the CRM Portal.
Expand the Store Manager menu and select Promotions.
Click the Create Promotion button.
Fill in the required fields to define your offer (see Promotion Configuration Fields below).
Click Create.
Promotion Configuration Fields
The setup for a promotion is similar to creating a coupon, with the main difference being that Promotions do not have a "Code" field. Find below the list of fields you need to configure a promotion, along with a description for each.
If you would like to get more details about the difference between promotions and coupons, read the related article Understanding Promotions and Coupons.
Basic Information
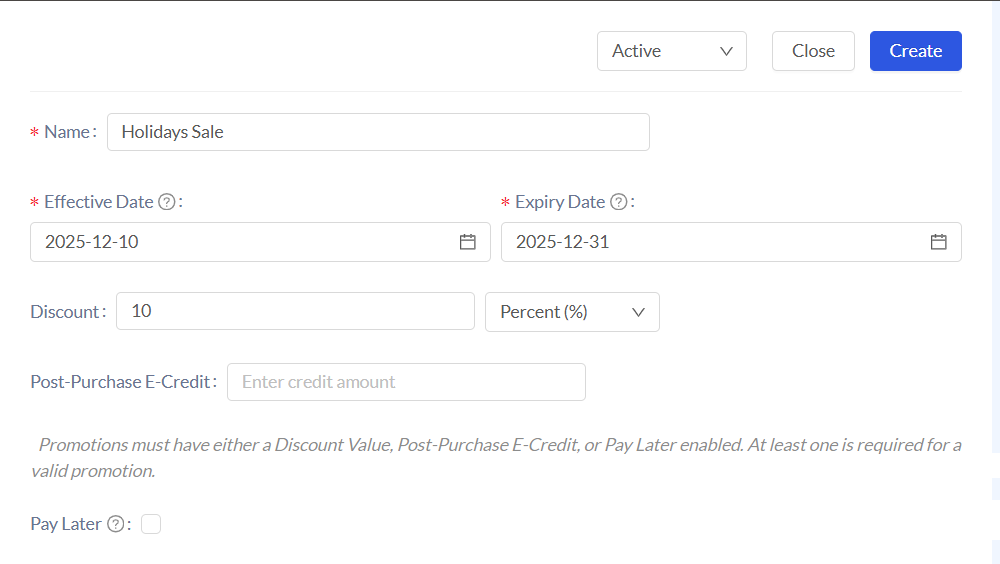
Start completing the promotion form by entering the following fields:
Name: Enter the internal name for the promotion (e.g., "Holiday Sale").
Effective Date / Expiry Date: Define the specific timeframe during which this promotion will be active.
Discount: Enter the value and select the type from the dropdown menu (Percent % or Fixed Amount).
Post-Purchase E-Credit: Enter an amount here if you want to give the patient store credit for future use instead of an immediate discount.
Activate the Pay Later option
This feature allows patients to save their payment method without being charged immediately. For detailed instructions on setting this up, please refer to the How to Set Up Pay Later guide.
Conditions
Use this section to define when the promotion triggers. The promotion will apply if ANY of the conditions you add are satisfied.
Condition Type: Choose whether the rule applies to specific Products or entire Categories.
Products/Categories: Select the specific items that trigger the promotion.
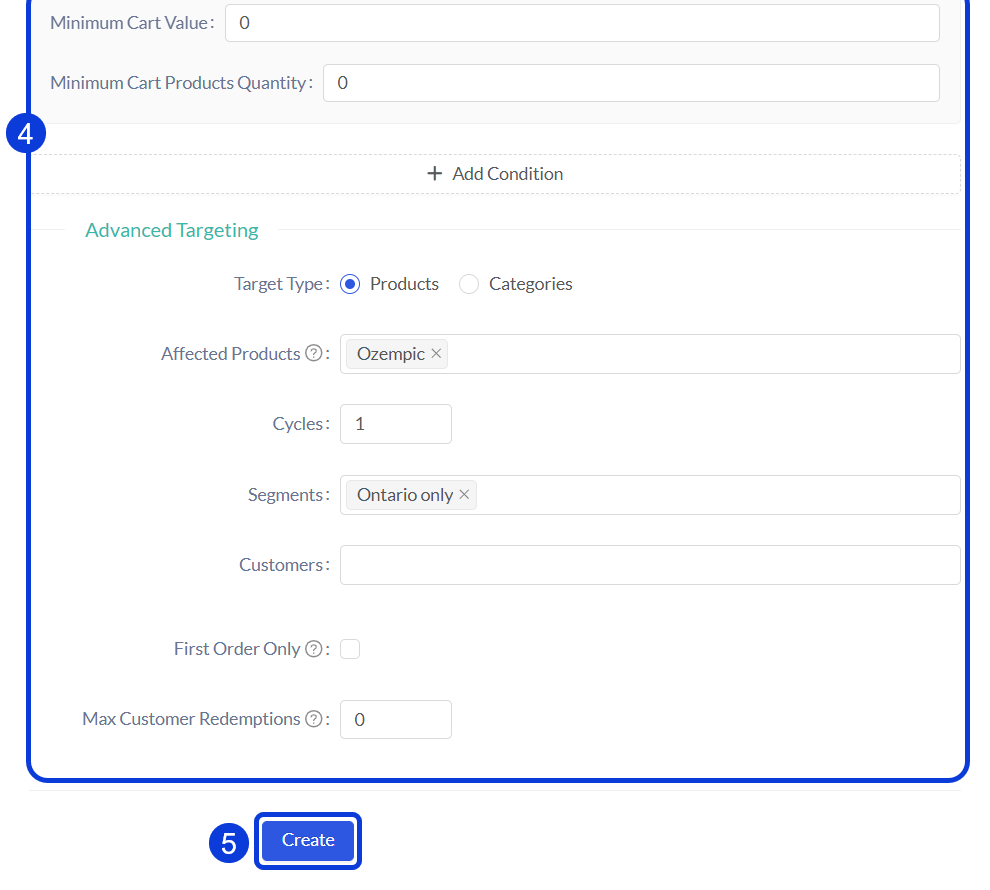
Minimum Cart Value: Set a minimum dollar amount the patient must spend for the promotion to apply.
Minimum Cart Products Quantity: Set a minimum number of items required in the cart.

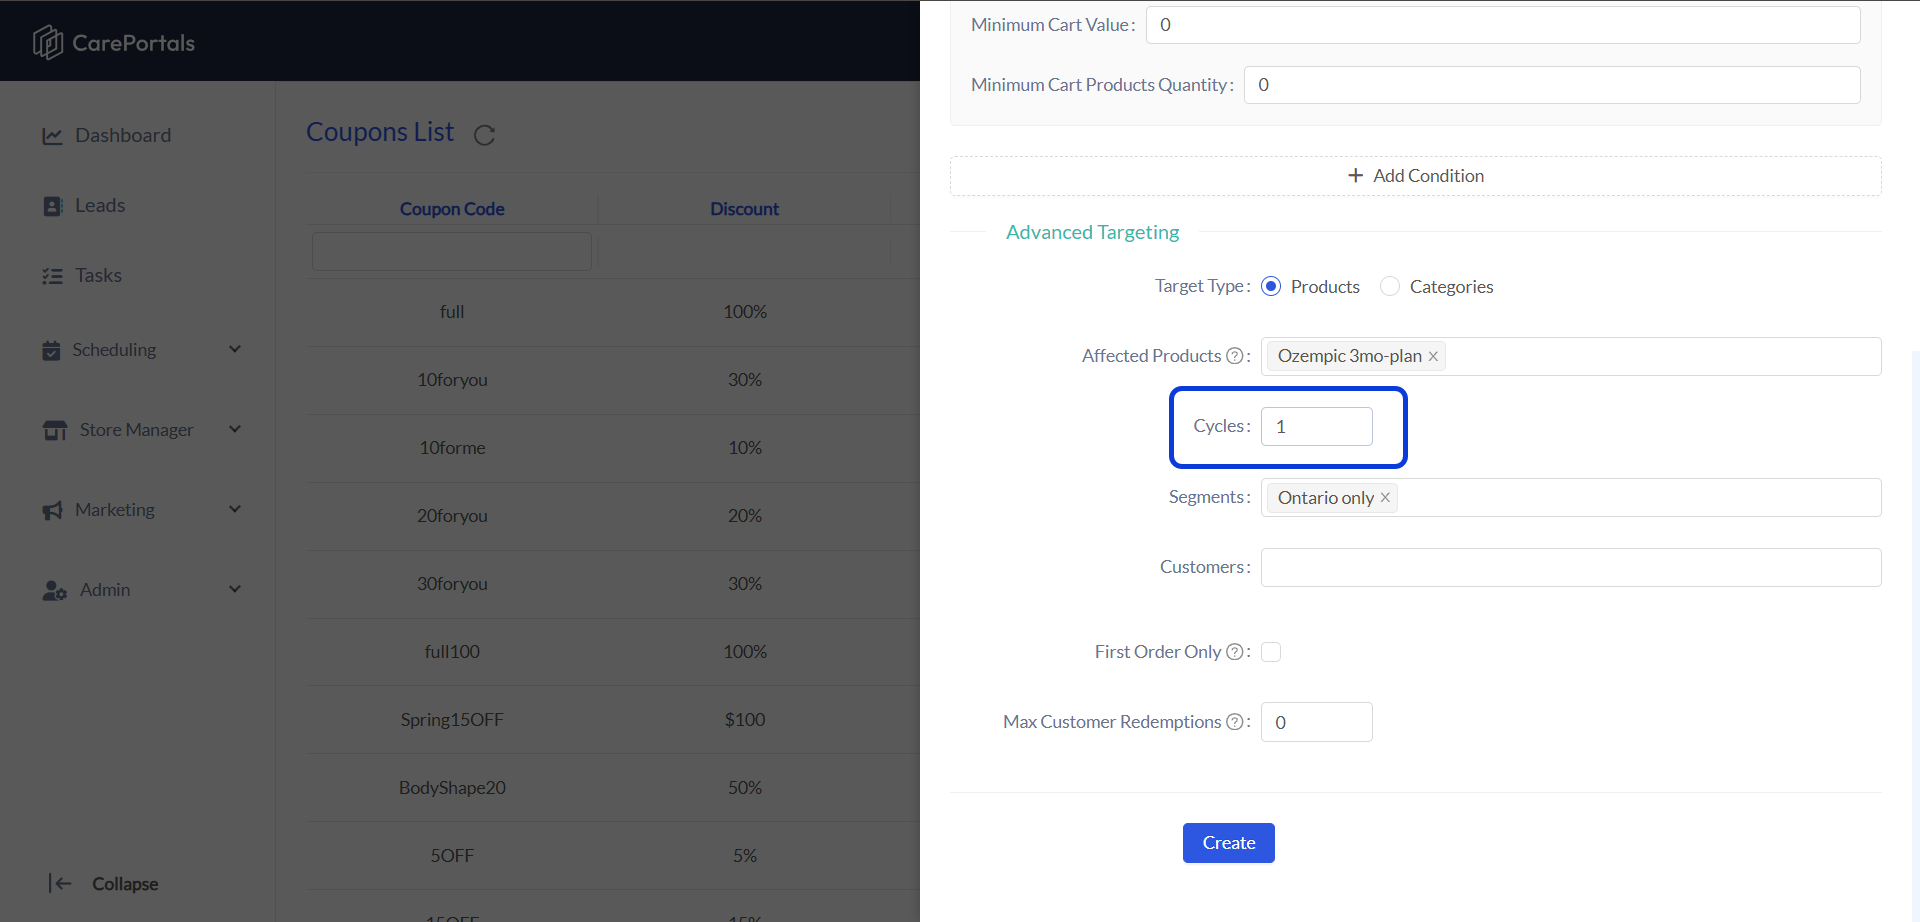
Advanced Targeting
Use this section to define who qualifies for the promotion or exactly what gets discounted.
Target Type & Affected Products: Specify if the discount applies to specific items or categories within the cart.
Segments: Limit the promotion to a specific group of patients (e.g., "Patients from California").
Customers: Limit the promotion to specific individual patients.
First Order Only: Check this box if the promotion should only apply to a patient's first purchase.
Max Customer Redemptions: Limit how many times a single patient can use this promotion.
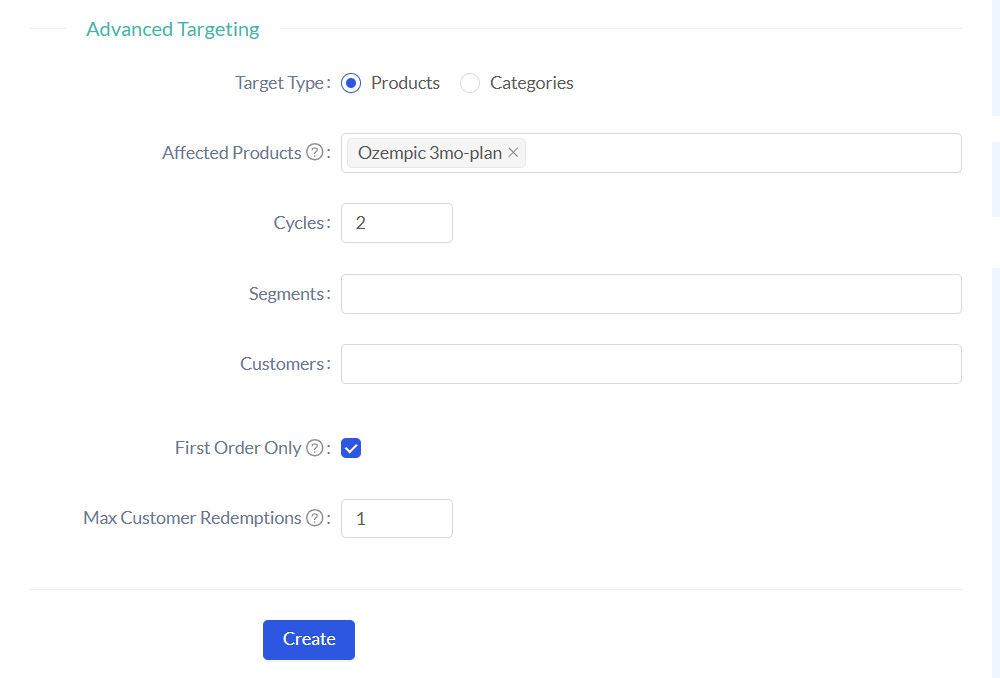
Subscription Products
If you select a subscription product as the Affected Product, a new field called Cycles will automatically appear. Here, you can define the number of cycles for which the discount will be applied (0 = unlimited cycles).
*Only one subscription product is supported per coupon.
Next Steps
How to Set Up Pay Later: Learn how to use the Pay Later option within promotions to authorize payments now and charge patients later via workflows.
How to Create a Coupon: Learn how to create code-based discounts for specific marketing campaigns.