How to Set Up Pay Later
The Pay Later feature allows patients to complete checkout without being charged immediately. Instead of paying upfront, the system saves their payment method securely for a later charge.
This is particularly useful for workflows where a patient should be charged only after they are approved for treatment.
This guide covers the two required steps to set this up: enabling the Pay Later option in the Store Manager and creating the automation to charge the patient later.
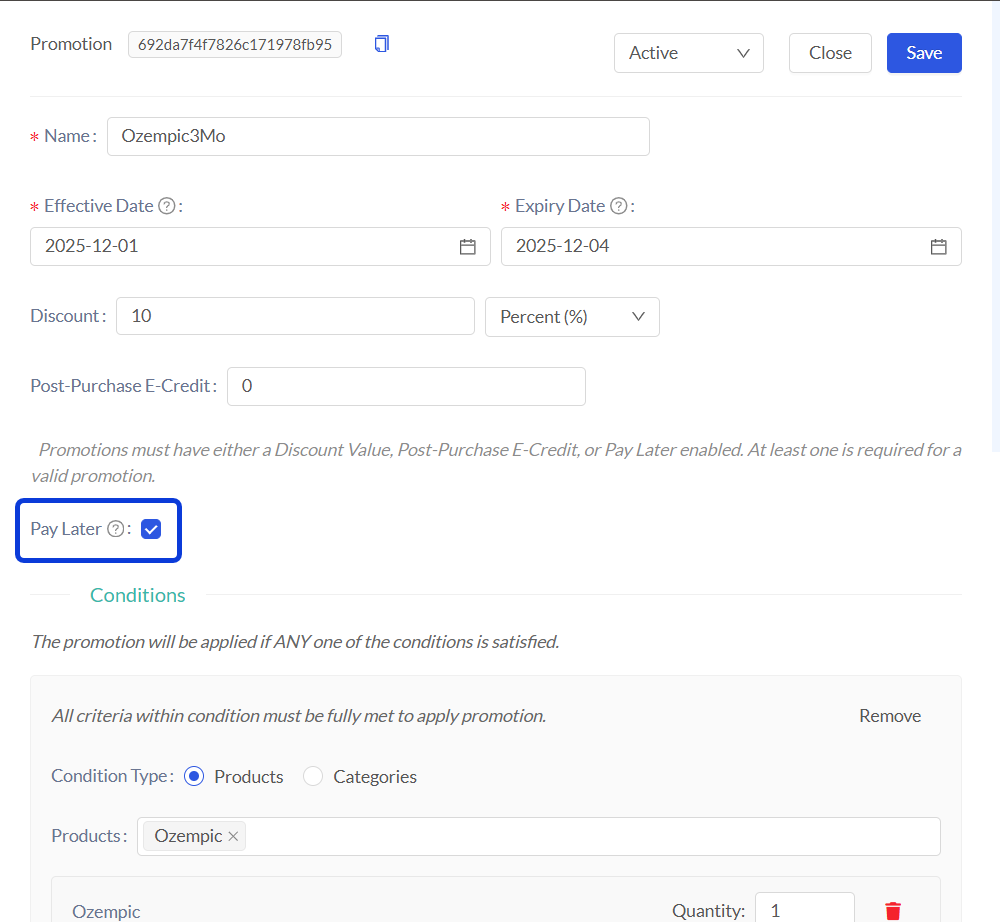
Step 1: Enable Pay Later in Promotions
To start, you need to configure a Promotion that activates this feature on the checkout page.
Log in to the CRM Portal.
Navigate to Store Manager > Promotions.
Click Create Promotion (or edit an existing one).
Locate the Pay Later section within the promotion settings and mark the checkbox to enable it.
Save or Create the promotion.
Once active, patients will see a ‘Due today: $0.00’ total in their order summary. Patients will still need to enter their payment details, but the checkout button will read "Pay $0.00 Now" to indicate they are authorizing a future charge.

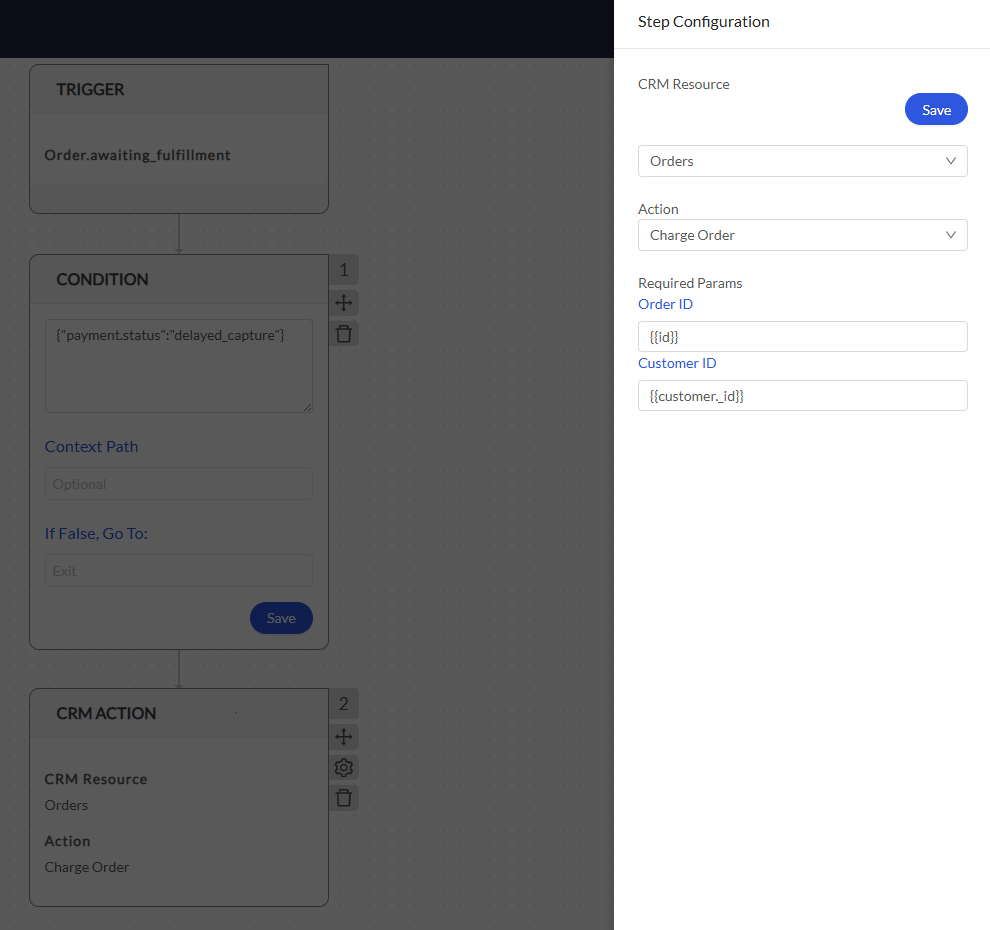
Step 2: Automate the Charge via Workflows
Since the patient was not charged at checkout, you must set up a Workflow to process the payment automatically.
How does the workflow work?
When the order moves to Awaiting Fulfillment (meaning the doctor approved it), the workflow checks if the payment was delayed. If it matches, the system uses the Charge Order action to capture the authorized funds instantly.
Access your CRM, and navigate to Admin > Workflows.
Click Create Flow.
Set the Trigger as
Order.awaiting_fulfillment. This ensures the workflow starts exactly when the prescription is created.Add a Condition (Safety Check) step to ensure you only charge Pay Later orders. Paste the following JSON code into the condition box:
{"payment.status":"delayed_capture"}and click Save (within the step). This condition prevents the system from double-charging standard orders that were paid upfront.Add a CRM Action to charge the patient and configure it as follows:
CRM Resource: Select Orders.
Action: Select Charge Order.
Order ID: Enter
{{id}}Customer ID: Enter
{{customer._id}}
Save the step configuration, and then Save the workflow.
Next Steps
How to Retry a Failed Payment: Learn how to manually re-attempt a failed payment directly from the order list.
Payment Processing Issues and Failures: Troubleshoot and resolve issues related to failed or unprocessed payments for an order
How to Manage Failed Workflow Runs: Learn how to find and diagnose failed workflow runs.
The Workflow Automation Engine (Explanation): Get a deeper understanding of how triggers and actions work to build different types of automated flows.
Order Status Definitions: Understand what each status means to understand the order journey and identify any issues that may require attention.
Manage an Order from Start to Finish: Learn how to monitor an order, and how a typical order journey would look like.