How to Create a Subscription Renewal Reminder
In this guide, you will learn how to create a workflow that sends an automatic SMS reminder to a patient before their subscription renews. Setting up this type of reminder helps with patient retention, prevents interruption in care, and reduces failed payments, ensuring smoother operations for your team.
Default Renewal Reminder
By default, the platform automatically triggers a renewal reminder for subscriptions 7 days before their due date. This is handled by the subscription.upcoming.renewal workflow trigger. While this 7-day trigger is automatic, you can create workflows to send additional reminders closer to the renewal date by using a Wait step.
Workflow Overview
This automated workflow consists of three key steps that run in sequence. Here’s a quick look at what you will build:
Trigger: The workflow will kick off automatically seven days before a patient's subscription is due to renew.
Wait and Condition: The workflow then waits for a set number of days and re-checks to confirm the subscription is still active before proceeding.
CRM Action: Finally, an SMS reminder is automatically sent to the patient, letting them know their renewal is approaching.
Step 1: Set the Trigger
Every workflow begins with a trigger, which is the event that starts the automation. For this reminder, the workflow will start automatically before a subscription is scheduled to renew.
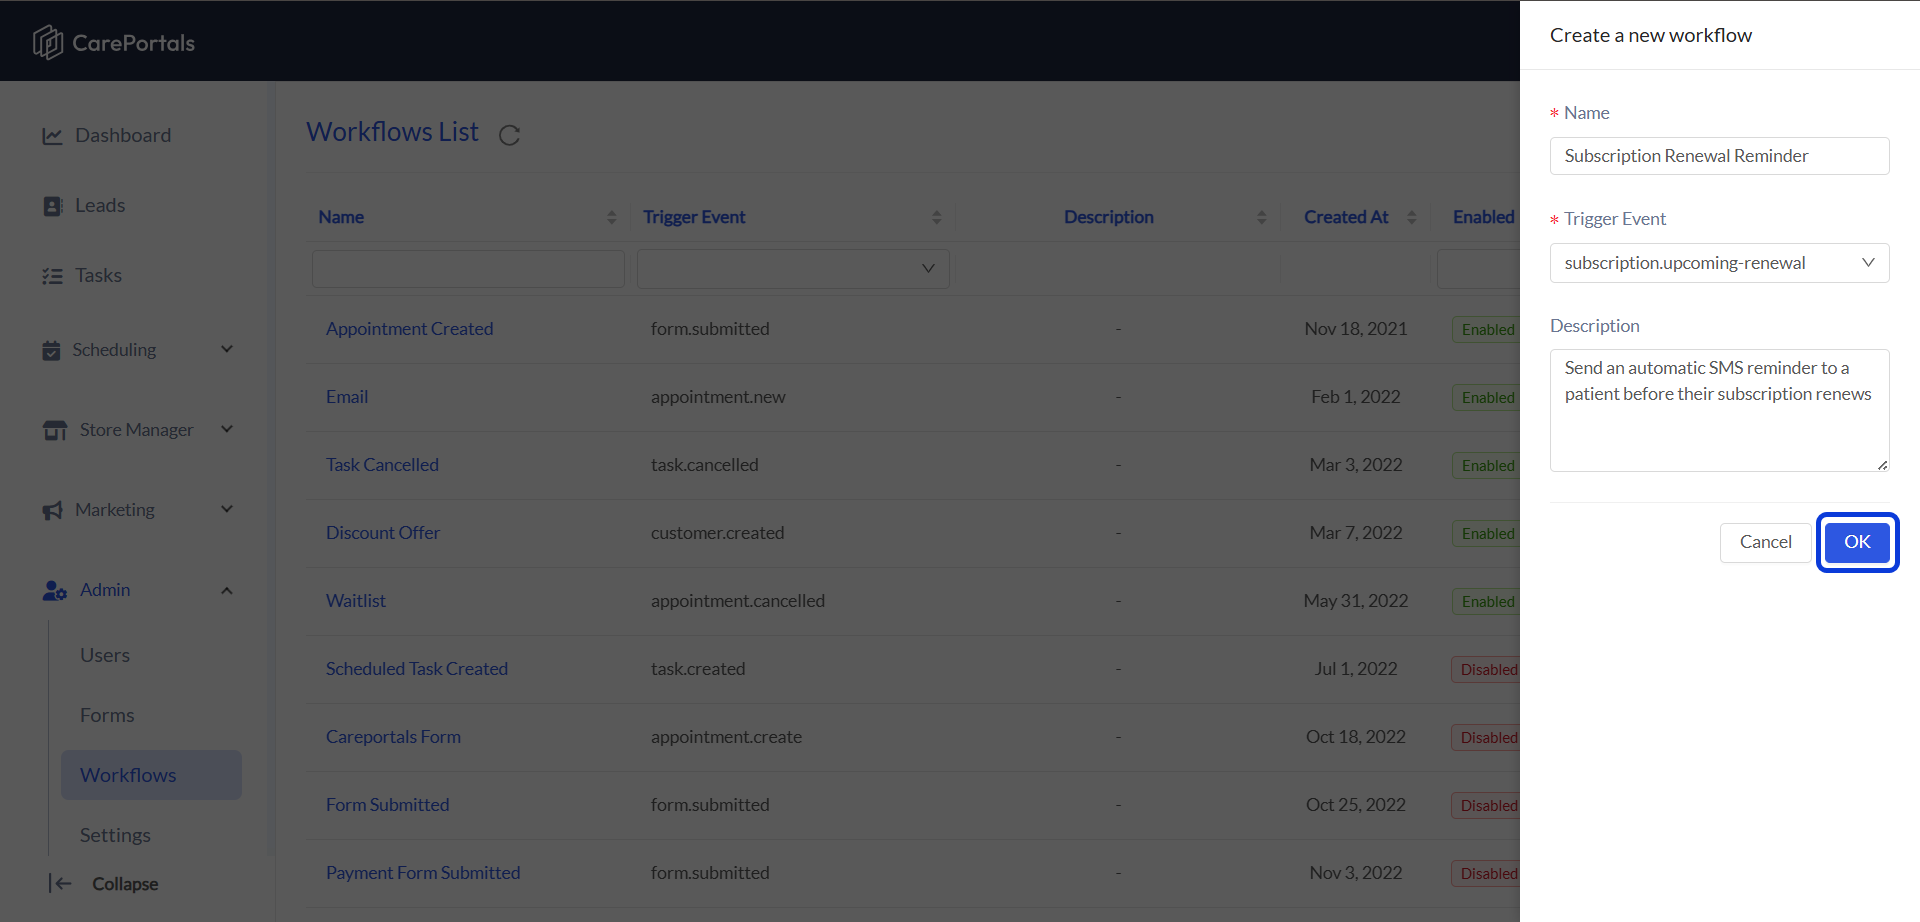
Navigate to the CRM Portal and go to Admin > Workflows > Create Flow.
Configure the trigger settings:
Name: Enter a clear name, such as “Subscription Renewal Reminder”.
Trigger Type: Select
subscription.upcoming-renewalfrom the dropdown menu. This trigger automatically runs seven days before the subscription's scheduled renewal date by default.
The seven-day interval cannot be changed. All subscription.upcoming-renewal events occur exactly seven days before the renewal date.
Step 2: (Optional) Add a Trigger Filter
A Trigger Filter makes your trigger more specific. This example filter ensures the workflow only runs for active subscriptions of a specific product.
In the Trigger Filter field, enter the following JSON:
{ "status":"active",
  "product._id":"YOUR_PRODUCT_ID"
}
Understand this filter:
"status":"active": This line makes sure the workflow only runs for subscriptions that are currently active."product._id": This line targets a specific product. You must replaceYOUR_PRODUCT_IDwith the actual ID of the product you want to send reminders for.
To learn more about Trigger filters, refer to How to Configure a Trigger with Filter.
Step 3: Add a Wait Step
You may want to send a reminder closer to the actual renewal date. This step adds a delay to the workflow for a set amount of time after the trigger. In this example, we will add a 4-day waiting period. This means the workflow will send a reminder 3 days before the renewal.
If you want to send the message exactly one week before the renewal, you can simply skip the Wait step.
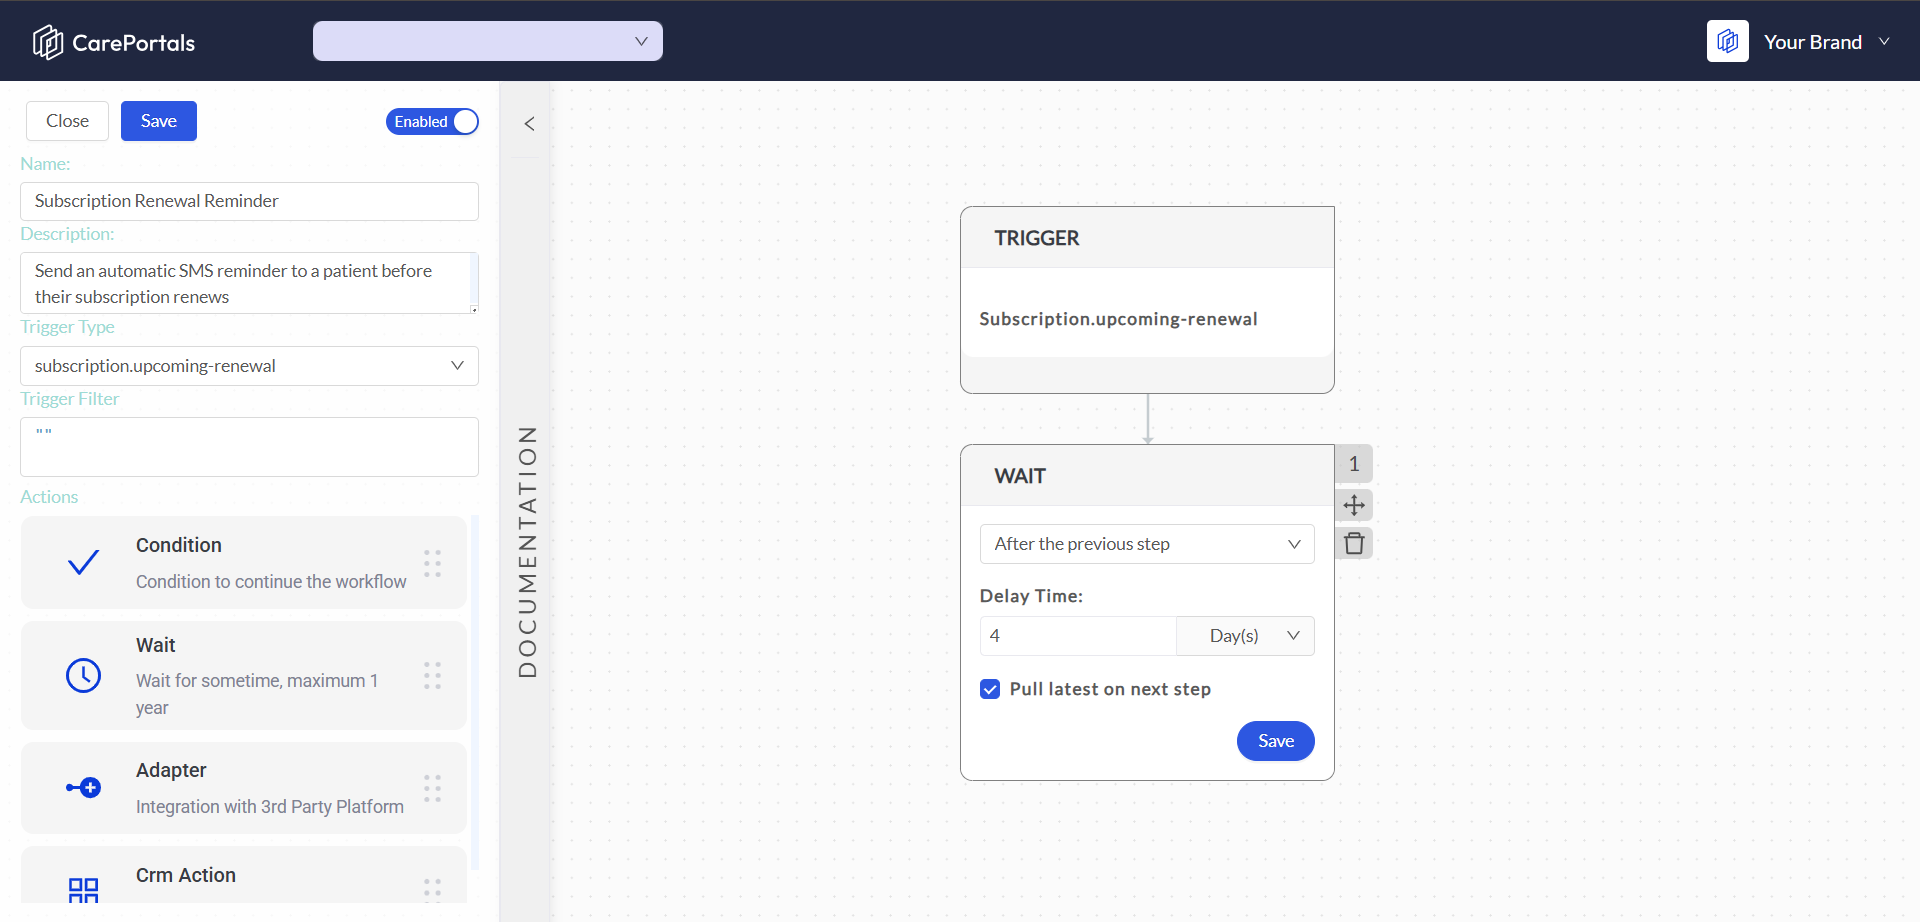
Add a Wait component to the workflow.
Configure the fields as follows:
Select After the previous step.
Delay Time: Enter
4and selectday(s)from the dropdown.
Check the box for Pull latest on next step.
Get the Latest Information
A patient might cancel or pause their subscription during the waiting period. The Pull latest on next step checkbox ensures the workflow has the most up-to-date information before it does anything else. Check this box to get the latest subscription details after the waiting period is over.
Step 4: Check if the Subscription Is Still Active
Next, you need to make sure you are not sending reminders for subscriptions that are no longer active. This Condition component checks the subscription's current status before proceeding.
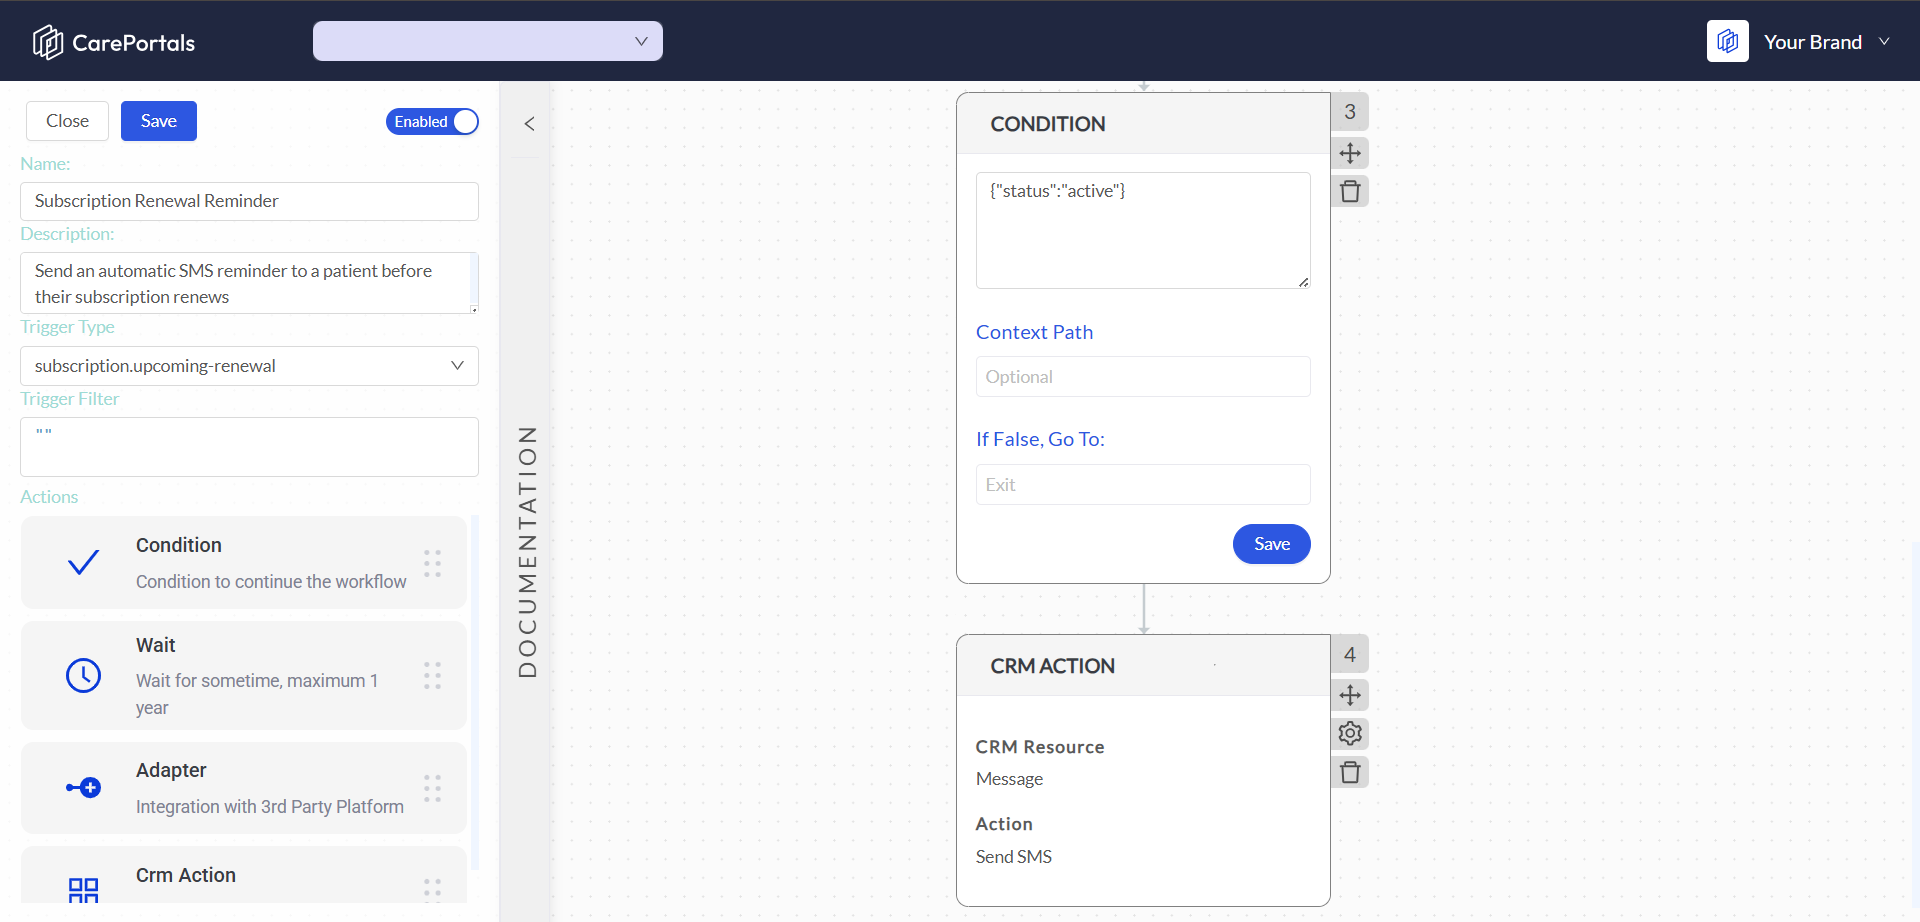
Add a Condition component to your workflow.
In the main condition input field, enter the following JSON:
{"status":"active"}In the If False, Go To: field, you can leave the
exitplaceholder. This means that if the condition is false, meaning the subscription is not active anymore, the workflow will end.
Understanding the Condition Logic
"status": This targets the status field of the subscription.
"active": This is the value to check for.
Together, this condition asks: "Is the subscription's current status 'active'?"
If the answer is TRUE, the workflow continues to the next step.
If the answer is FALSE (for example, the subscription is "paused" or "canceled"), the workflow follows the If False, Go To: rule and stops.
Step 5: Send the SMS Reminder
This is the final action. If the subscription is still active, the workflow will send the SMS reminder to the patient.
Add a CRM Action to the end of the workflow.
Configure the fields to send the message:
CRM Resource: Select
Message.Action: Select
Send SMS.Under the Parameters section, configure the message details:
To: Use a dynamic variable to pull the patient's phone number. The variable will look similar to
{{customer}}.Message: Compose the reminder text. You can use variables to personalize the message. For example:
Hi {{customer.firstName}}, this is a reminder that your subscription will renew in 3 days.
Step 6: Save and Enable the Workflow
Your workflow is now fully built. The last thing to do is save your work and make sure it is active.
Click the Save button at the top of the page.
Ensure the toggle switch at the top of the editor is set to Enabled. This means it is active and ready to run.
That is it. You have successfully created an automated reminder system that will help ensure patients are aware of their upcoming subscription renewals.
Next Steps
If you are interested in learning how to create other types of workflows, you can check the following guides.
Send a Slack Notification for New Patient Workflow: Learn how to use webhooks to connect to other platforms.
Send a Prescription Order to a Pharmacy via LifeFile: Learn how to automate sending orders to your pharmacy partners.
Add a New Patient to a HubSpot Marketing List: Learn how to automatically add new patients to your marketing lists.